The Kody Merchant Portal, otherwise known as our content management system (CMS) allows you to manage everything from transactions, what items are on your menu, discounts, opening times, creating reports, tax and inventory management, service charges, printing templates and more.
The CMS can be accessed through any web browser. It is recommended to do this from a device with a large screen such as a Desktop or Laptop using the Google Chrome Browser.
The web address (URL) is: cms.kodypay.com/login
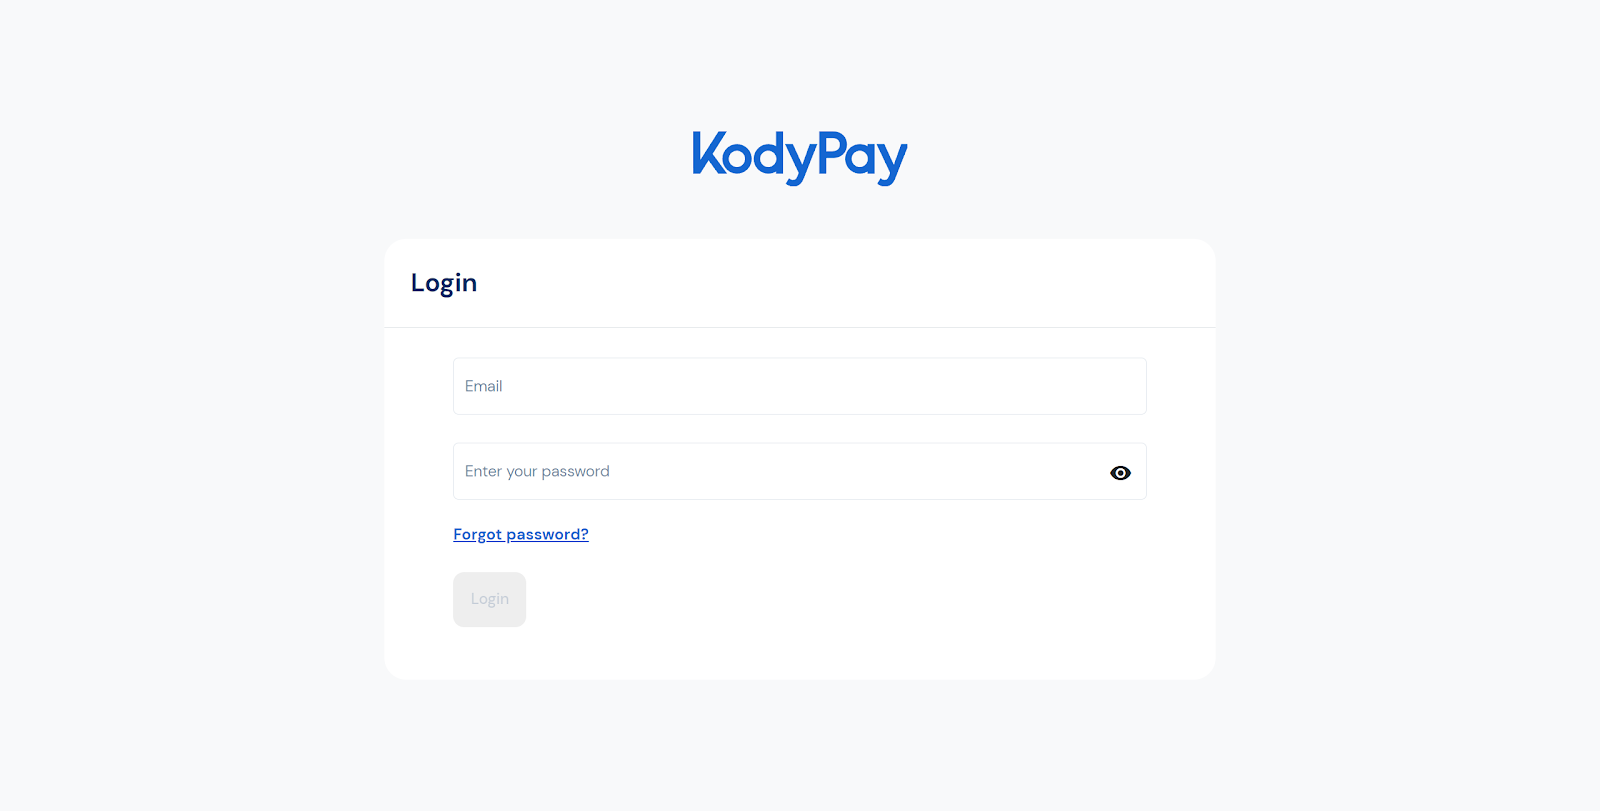
Your Email and Password should have been sent to you by the member of our team who helped you join and set-up with Kody. If you are missing your Email or Password then please see What if I am missing my Email or Password for more information.
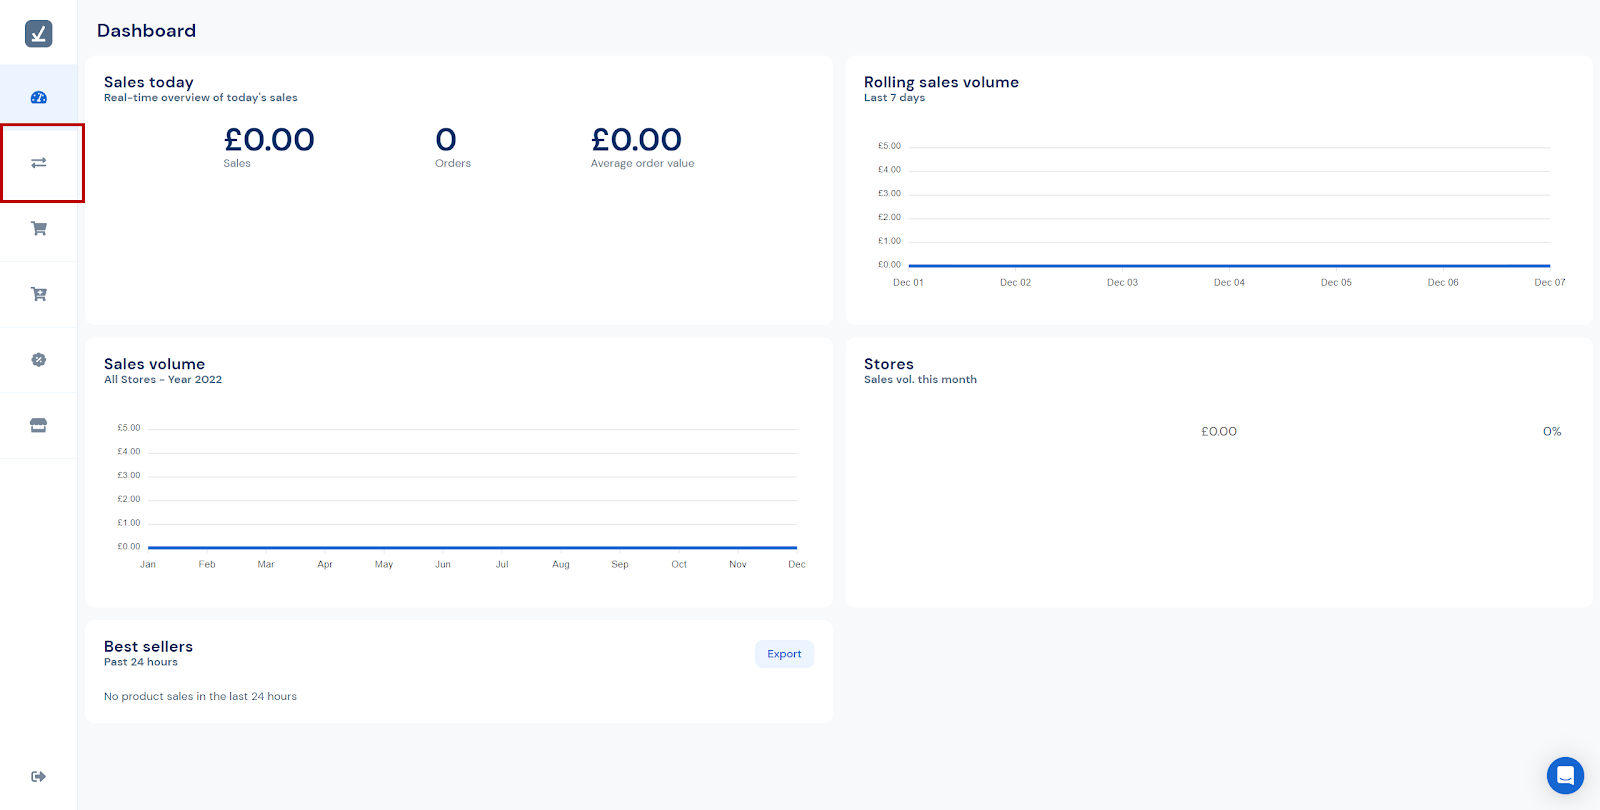
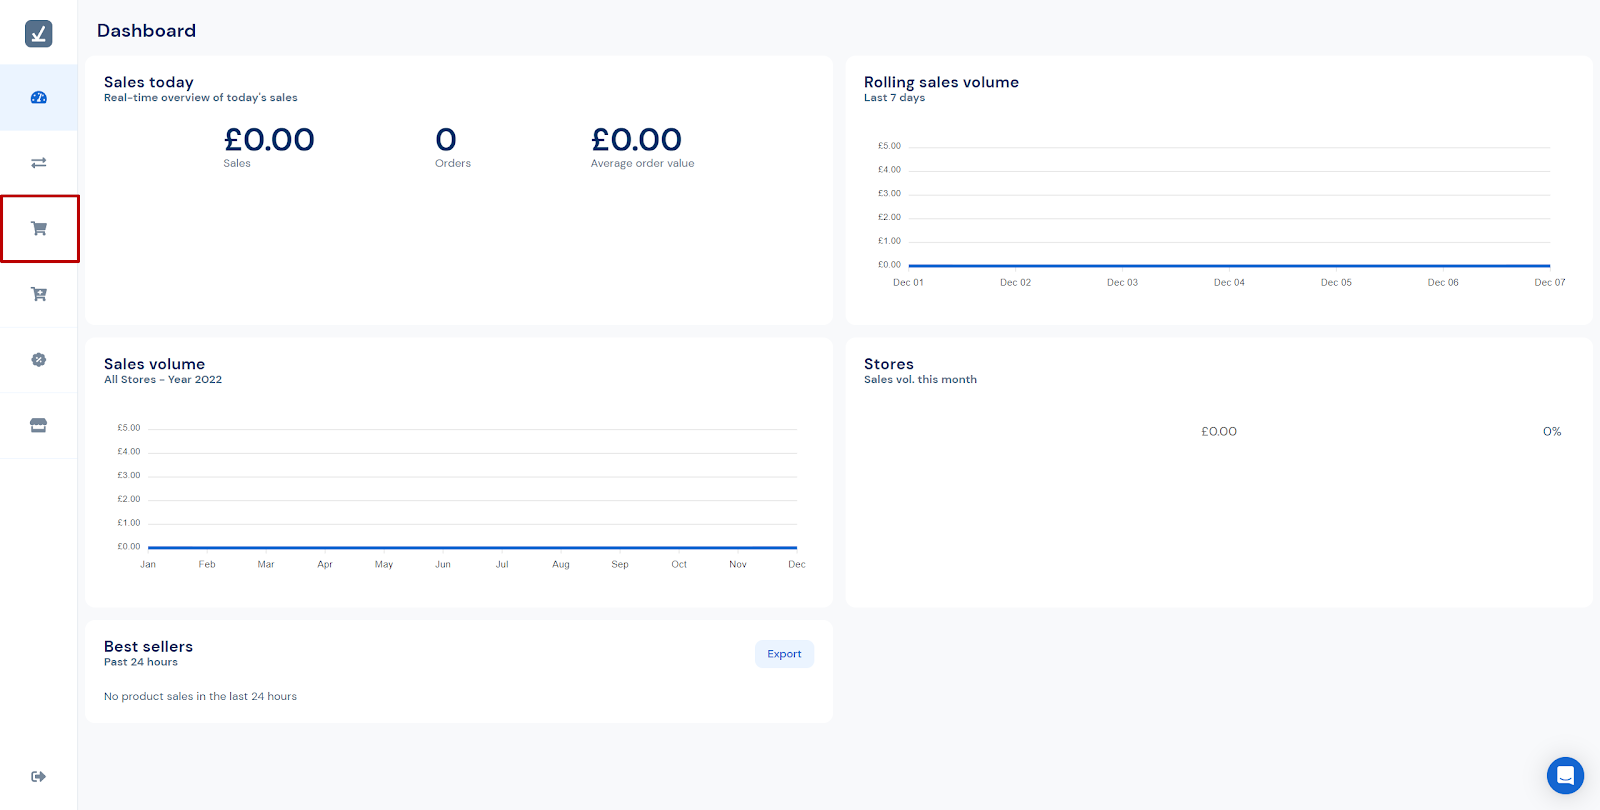
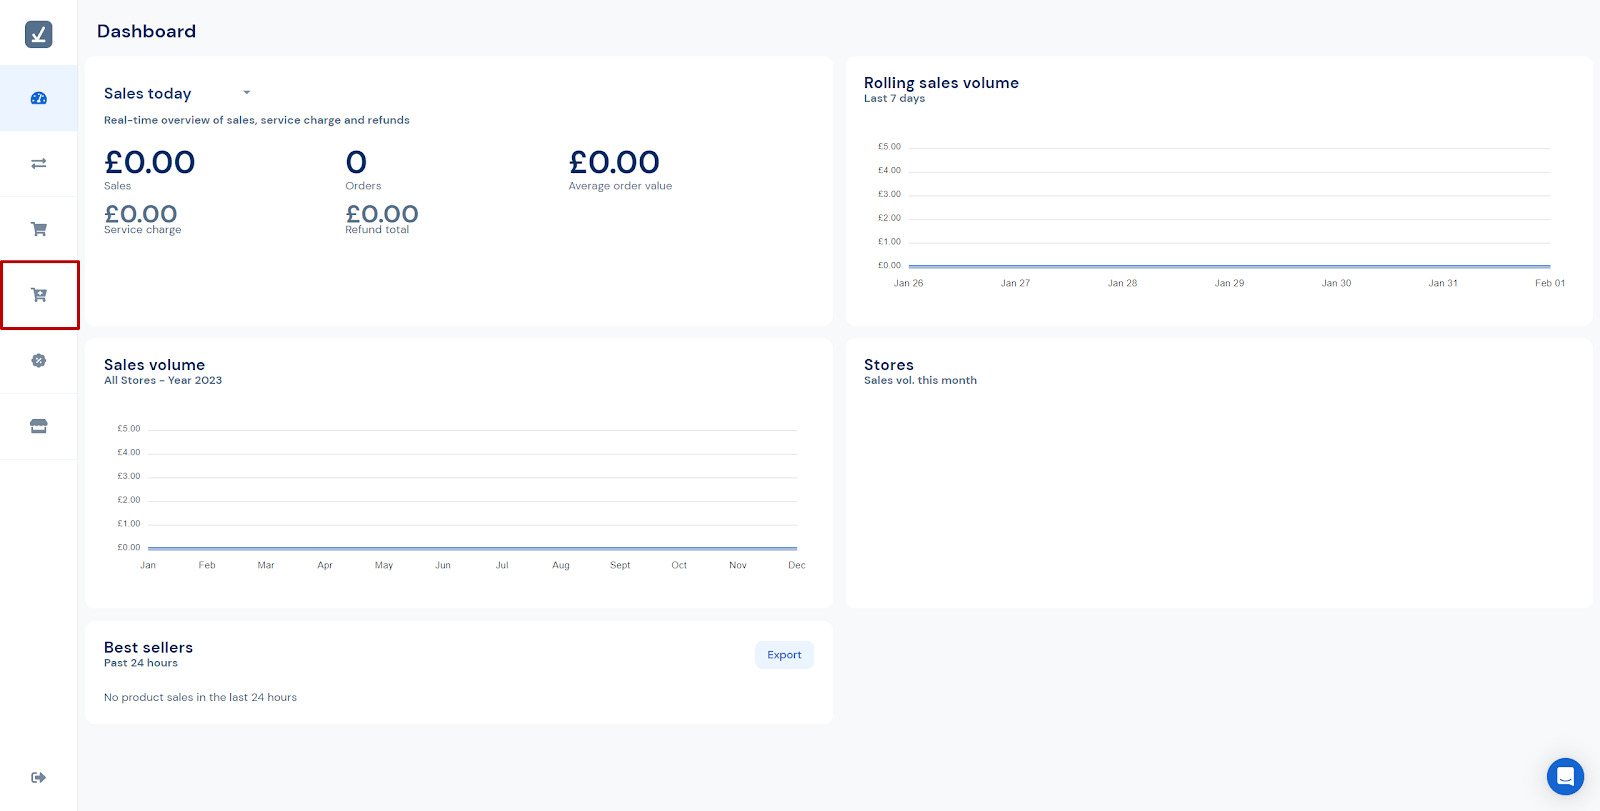
After logging in to the CMS, the Dashboard will be presented.
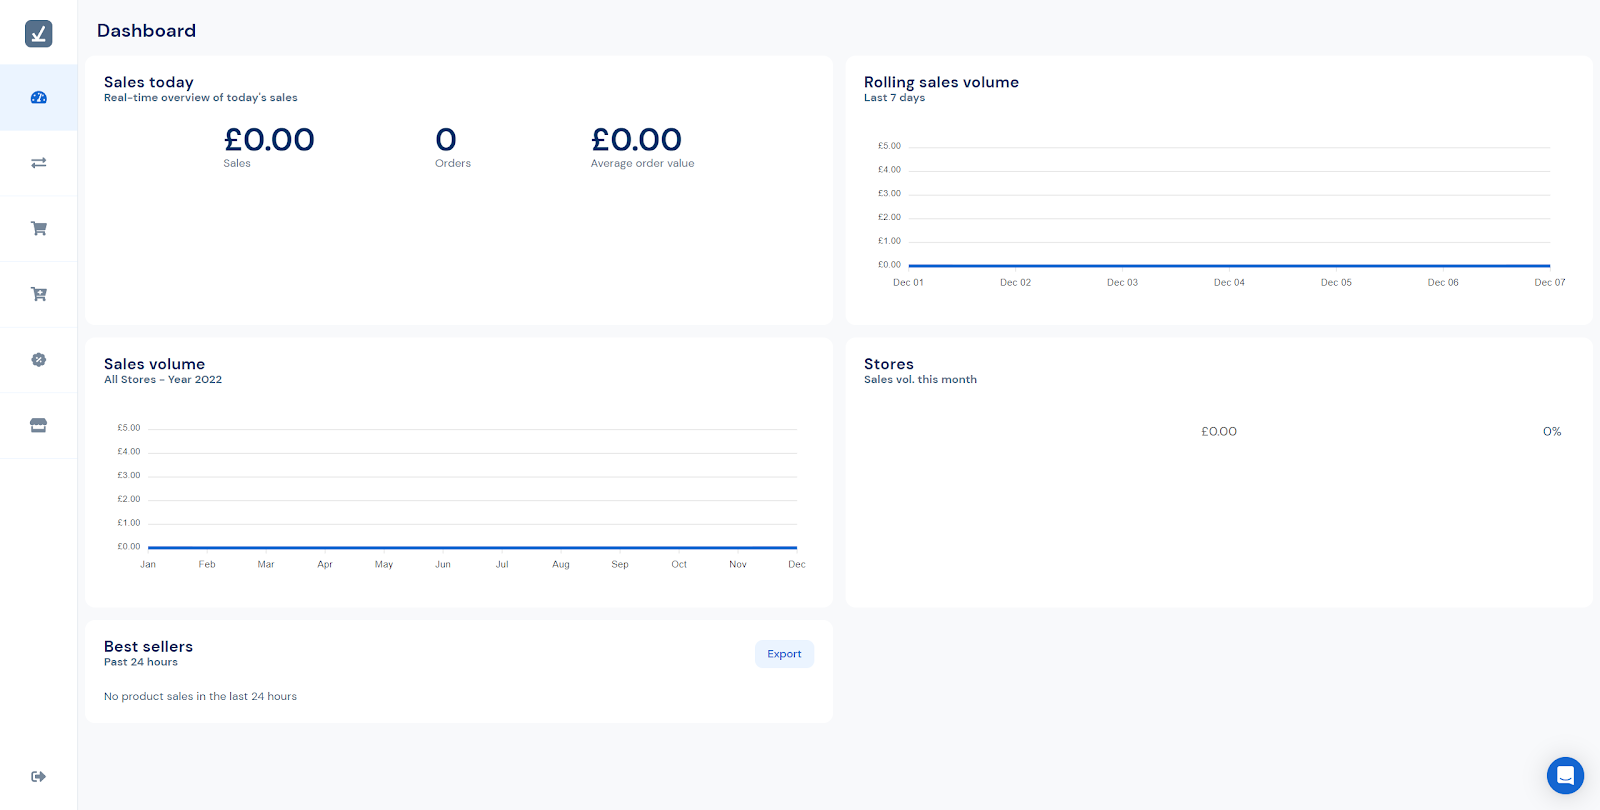
Here you can see a summary of your sales today, the last 7 days and over the current year. There is also a list of your Best Sellers in the last 24 hours which can be exported.
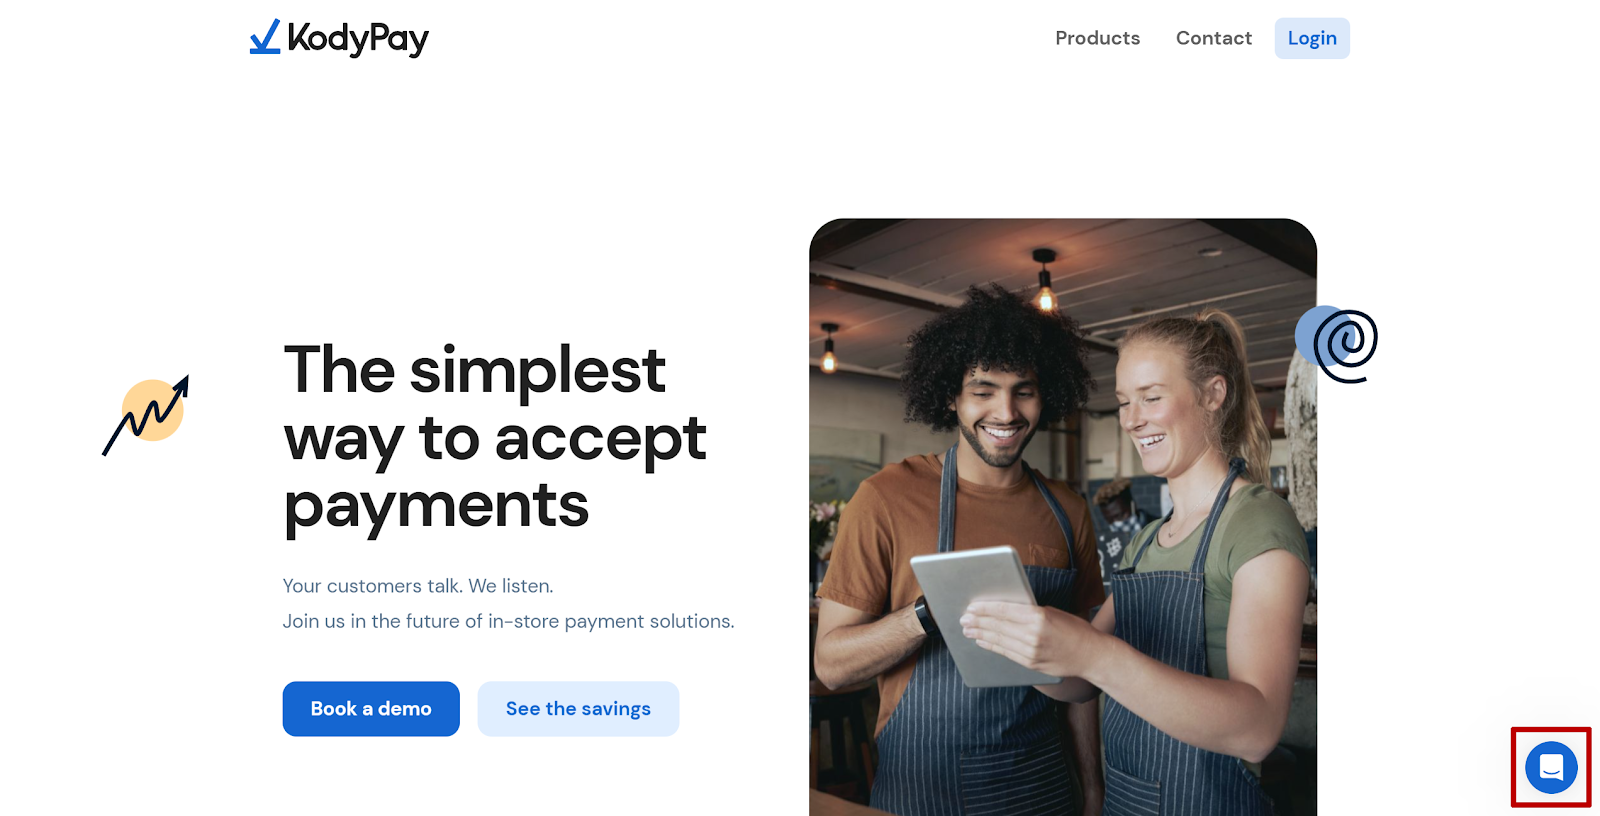
Please message your contact at Kody via WhatsApp, email (support@kody.com) or our Online Chat on our website (kody.com). For more information see: How do I get in contact with someone at Kody for assistance?
You can:
Email support@kody.com and another member of the team will get back to you shortly.
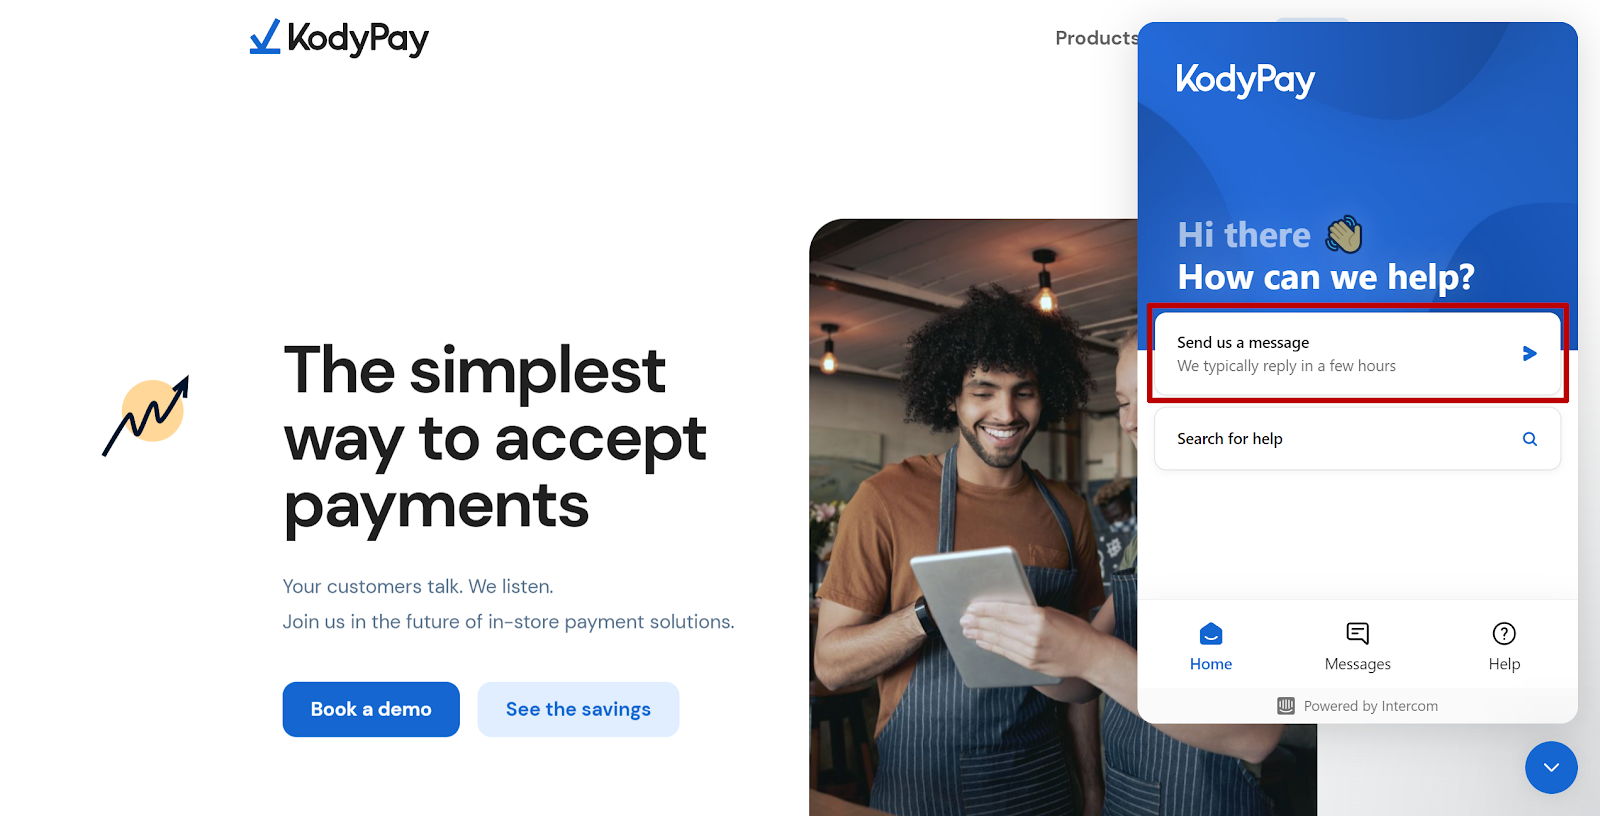
Use the Online Chat on our website kody.com:

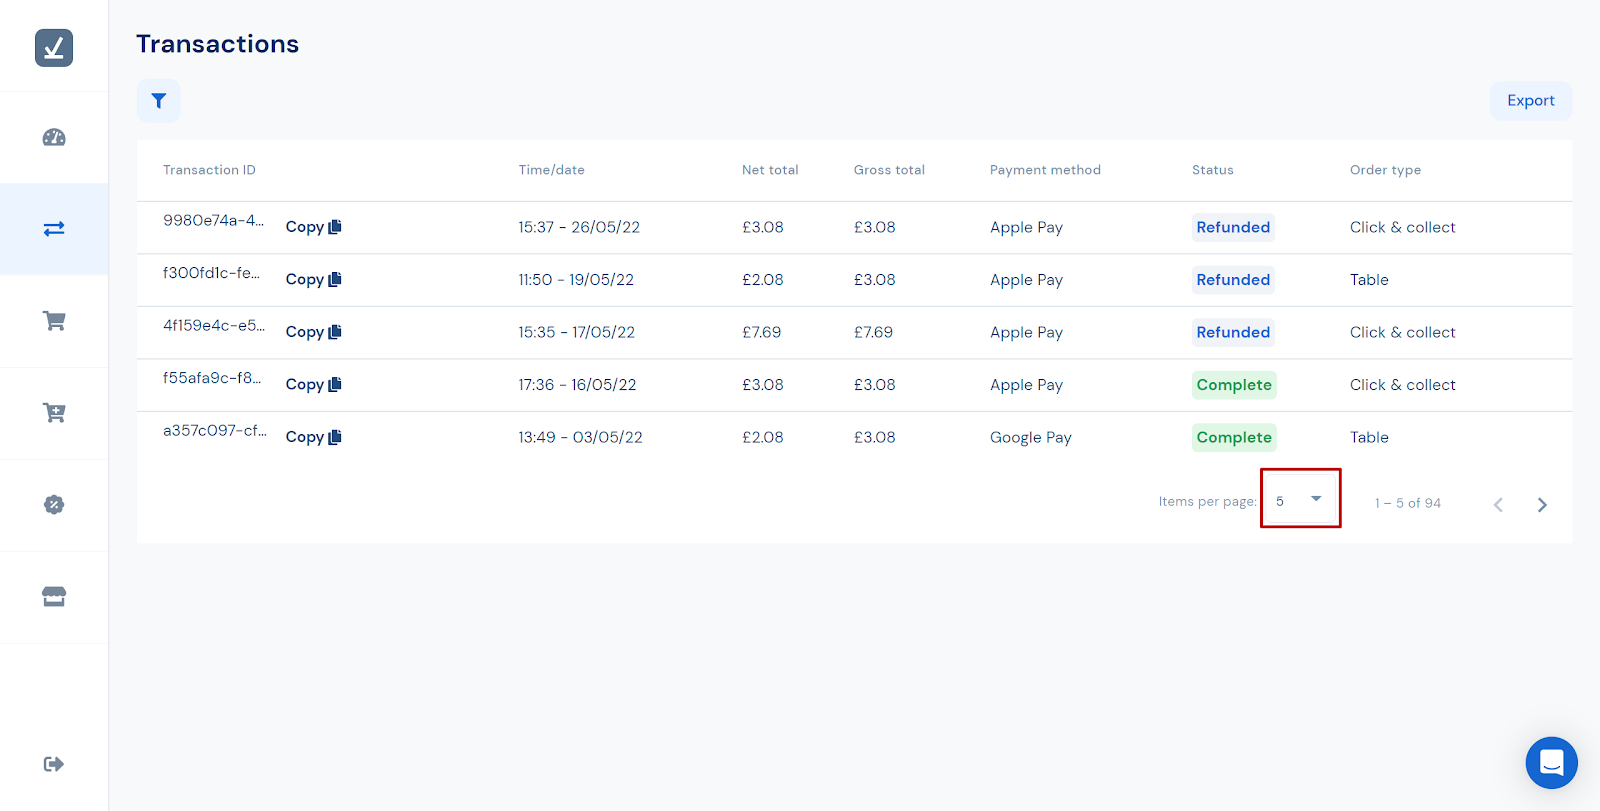
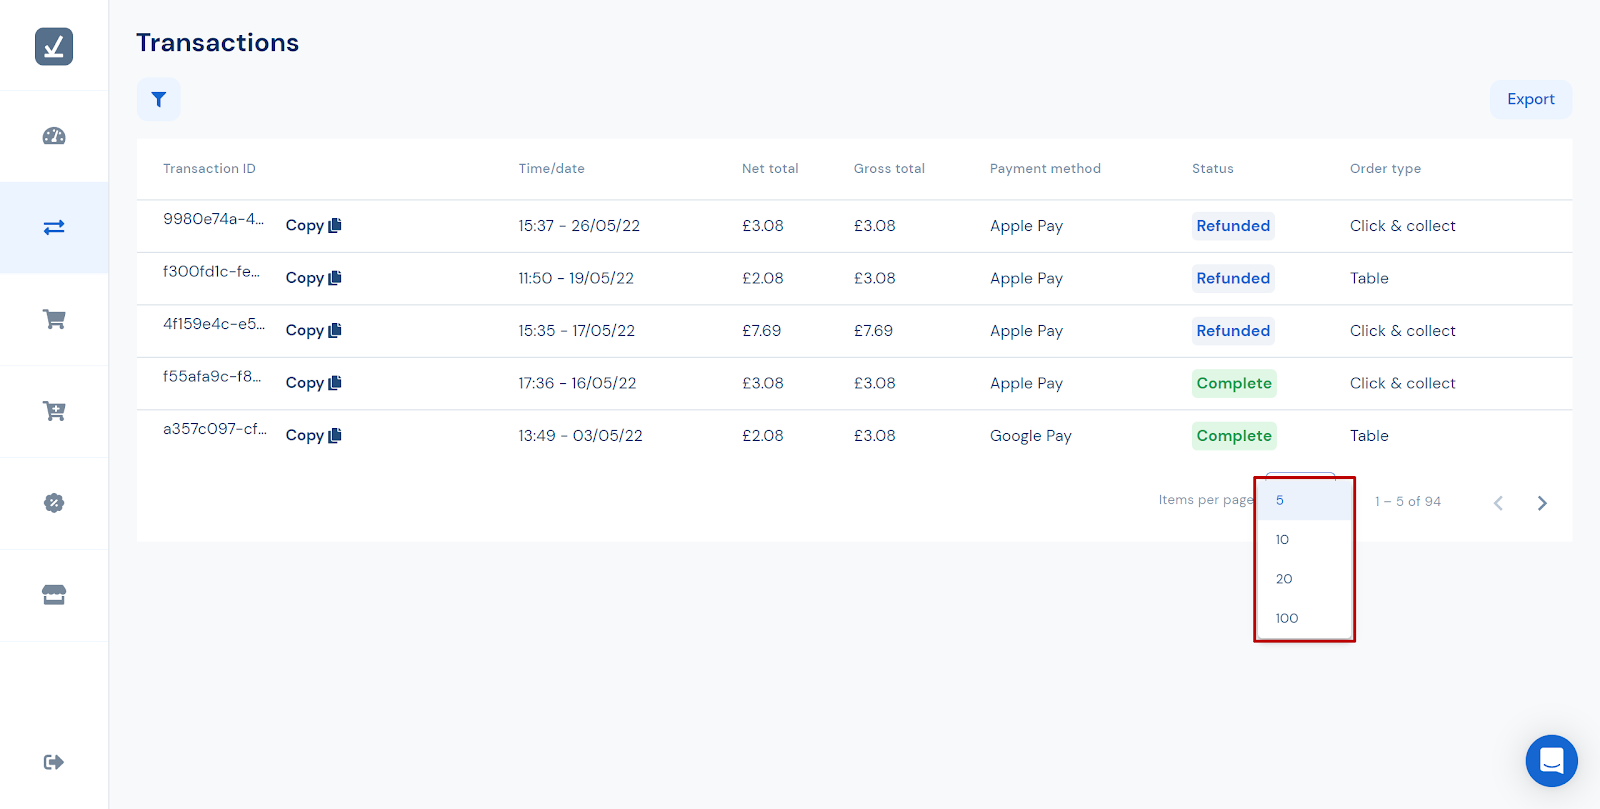
The full list of items, transactions or add-ons etc will be divided into pages if it cannot all be shown at once. To show more per page:
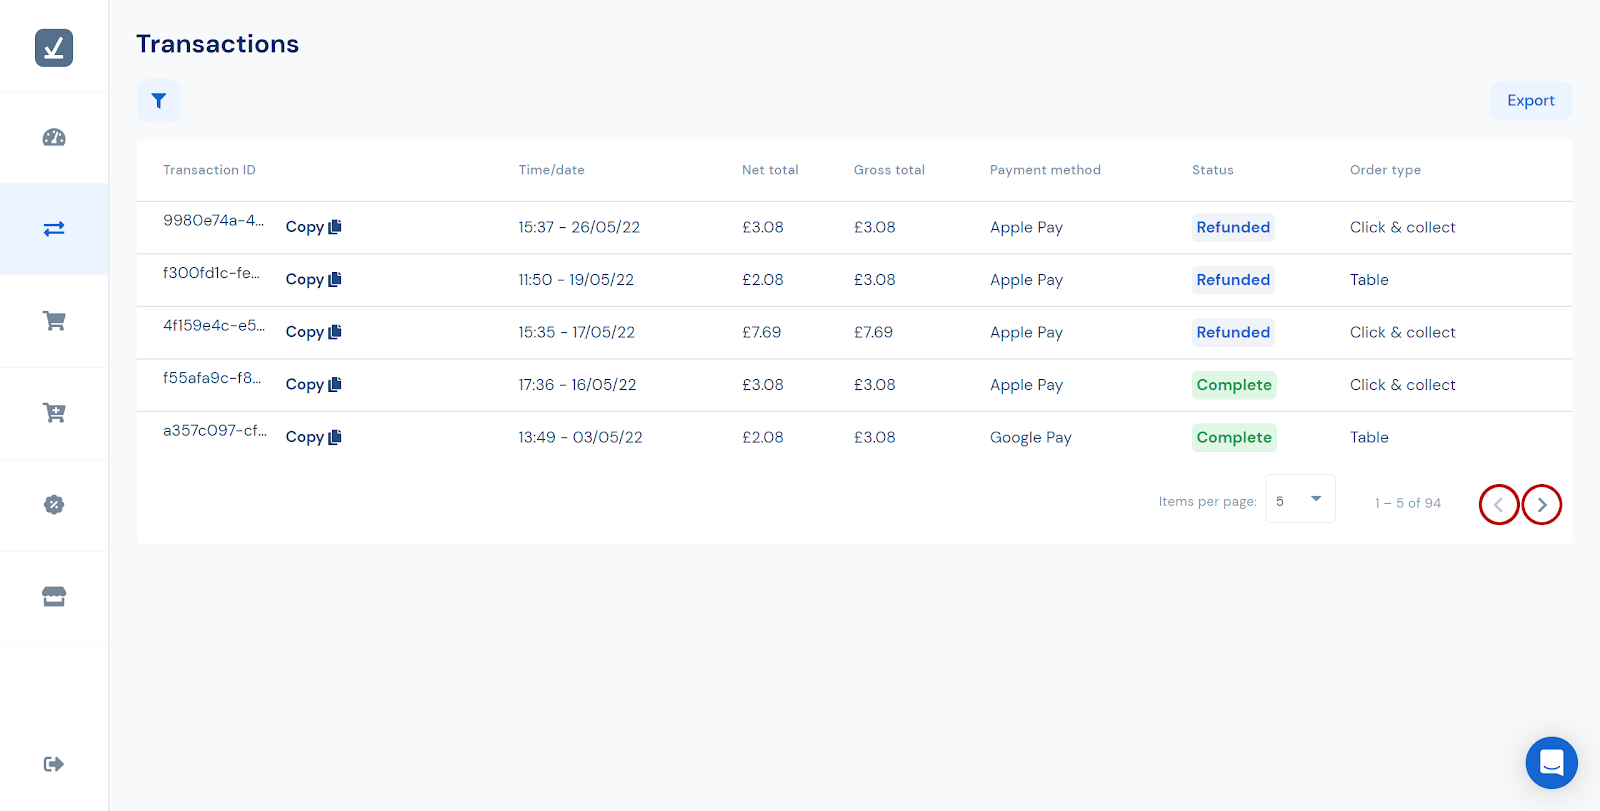
Use the arrows at the bottom of the list to navigate up and down the list. The left arrow will move up the list, the left arrow will move down the list. For transactions the right arrow will show older transactions, the left arrow will show more recent transactions.
The arrows are highlighted with red circles on the screenshot below.
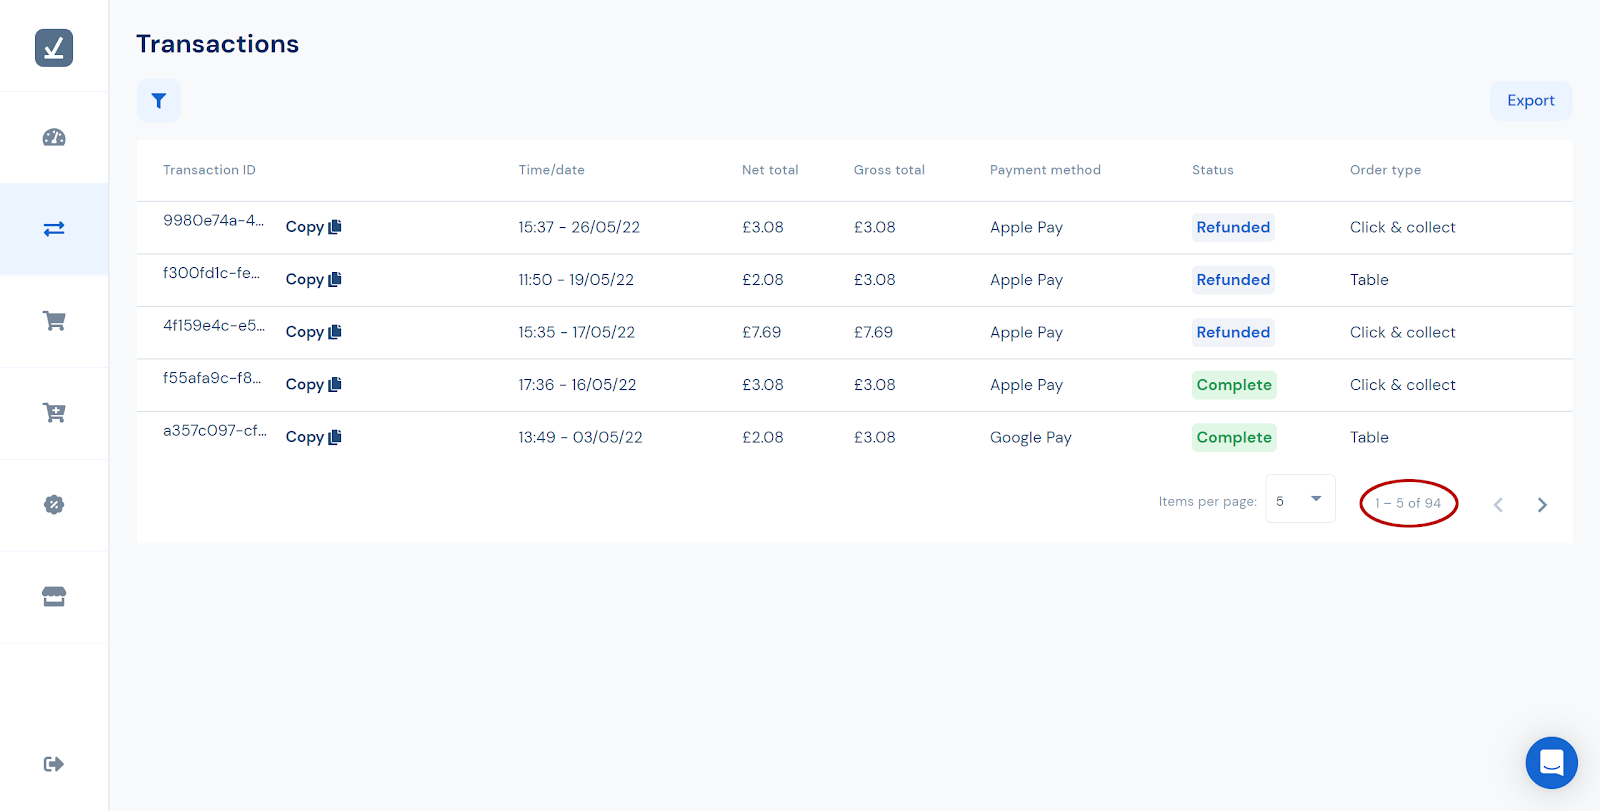
The current items’ positions in the list are displayed in the bottom right, to the left of the navigation arrows.
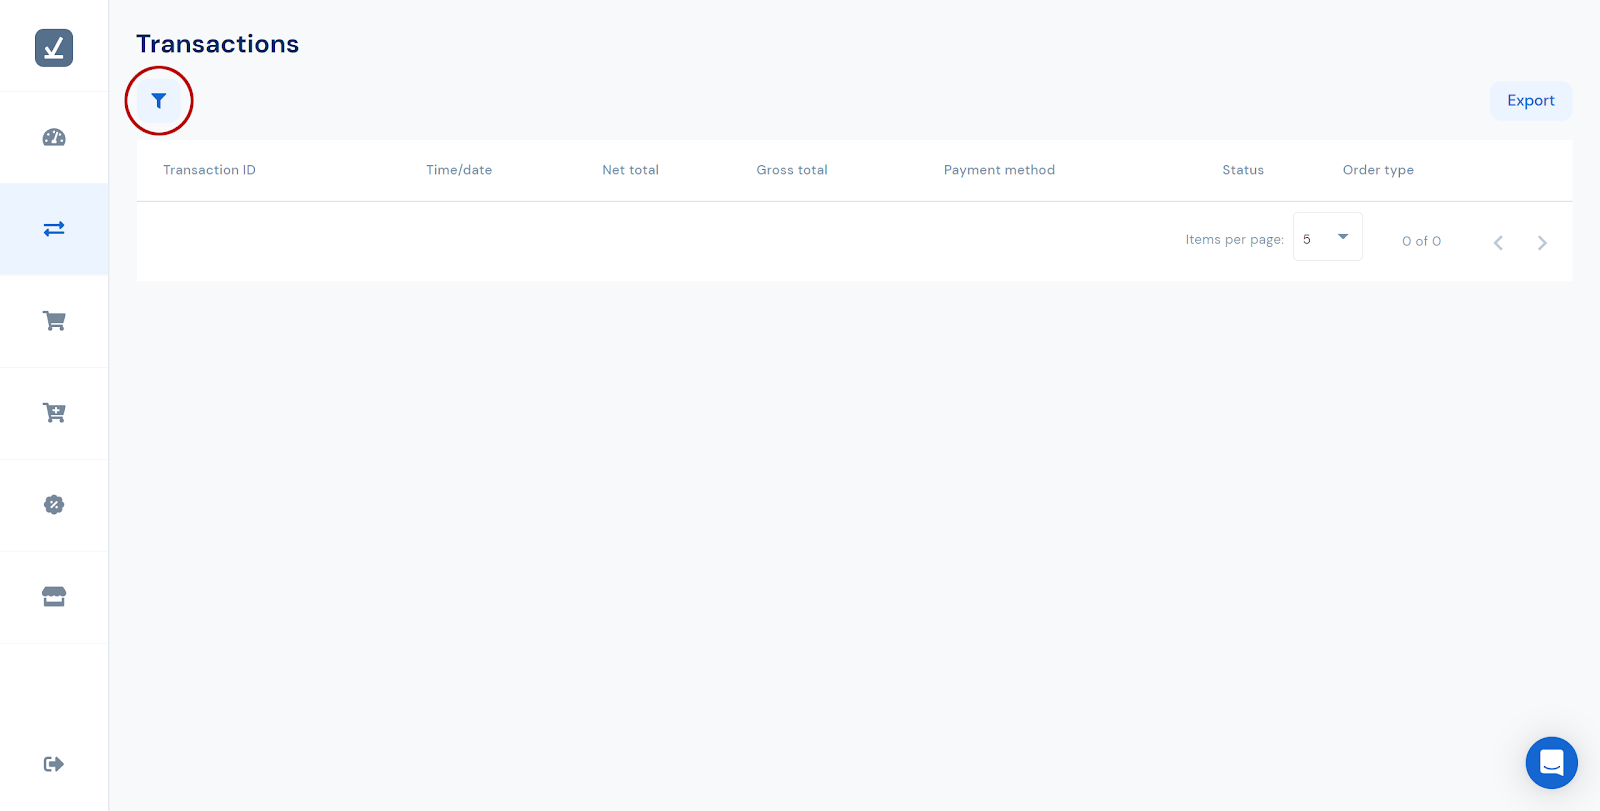
You can get to the Transactions page by clicking the third icon down on the sidebar on the left.
Transactions can be exported using the ‘Export’ button in the top right.

This will export all transactions to date, unless using a filter into a .csv, Comma Separated Value, file. This file will automatically be downloaded but your browser may ask for permission before completing the download. The .csv file download can be found in your ‘Downloads’ folder or other default download folder location. The .csv file can be opened in a spreadsheet editor such as:
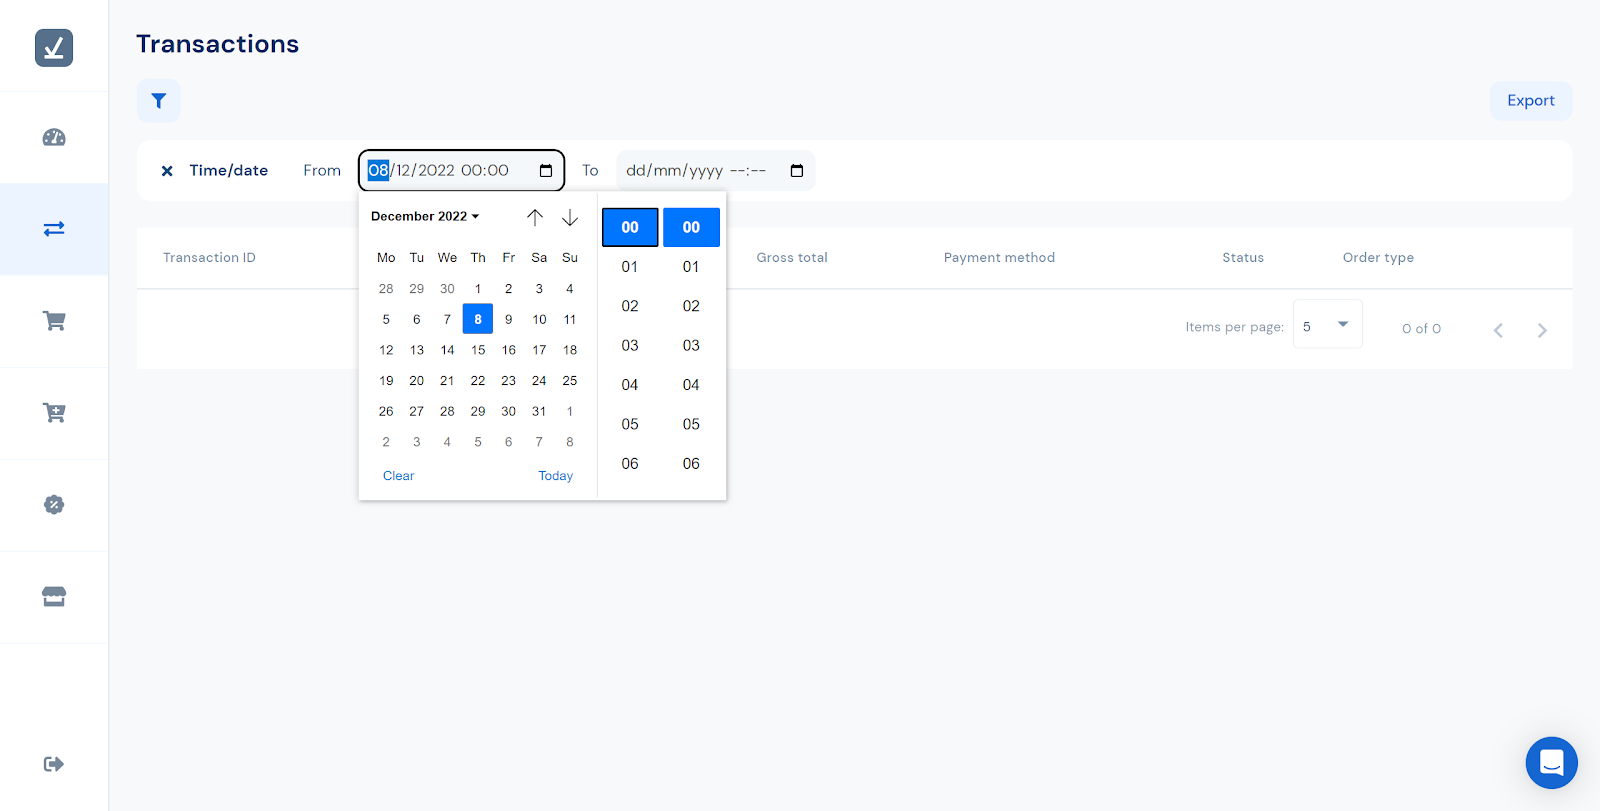
The dates and times can be typed in manually or they can be selected using a menu by clicking the calendar icon.
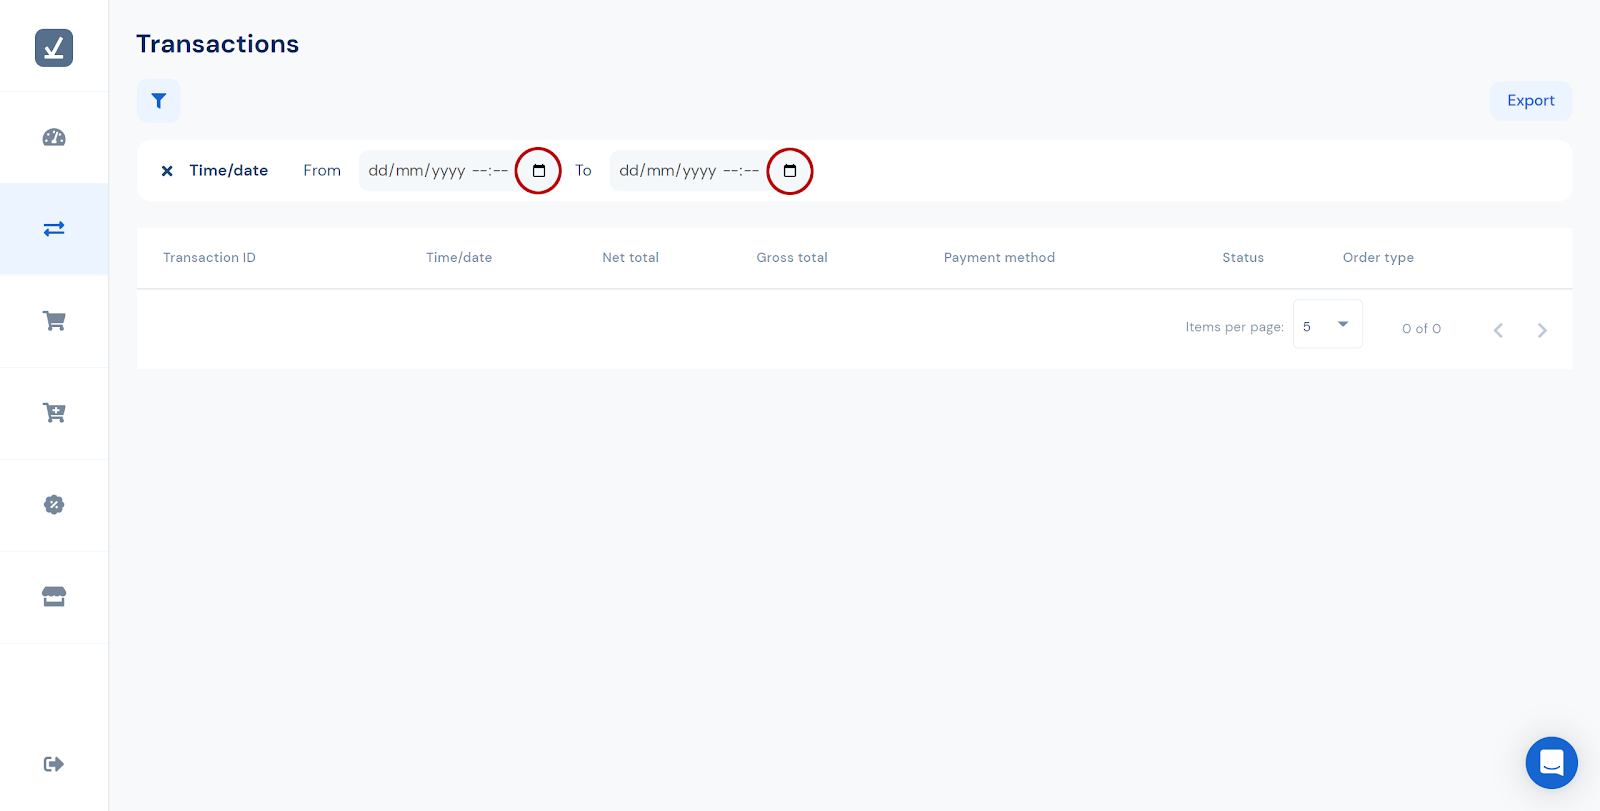
A date can be selected using the calendar on the left and a time can be selected from the clock on the right.
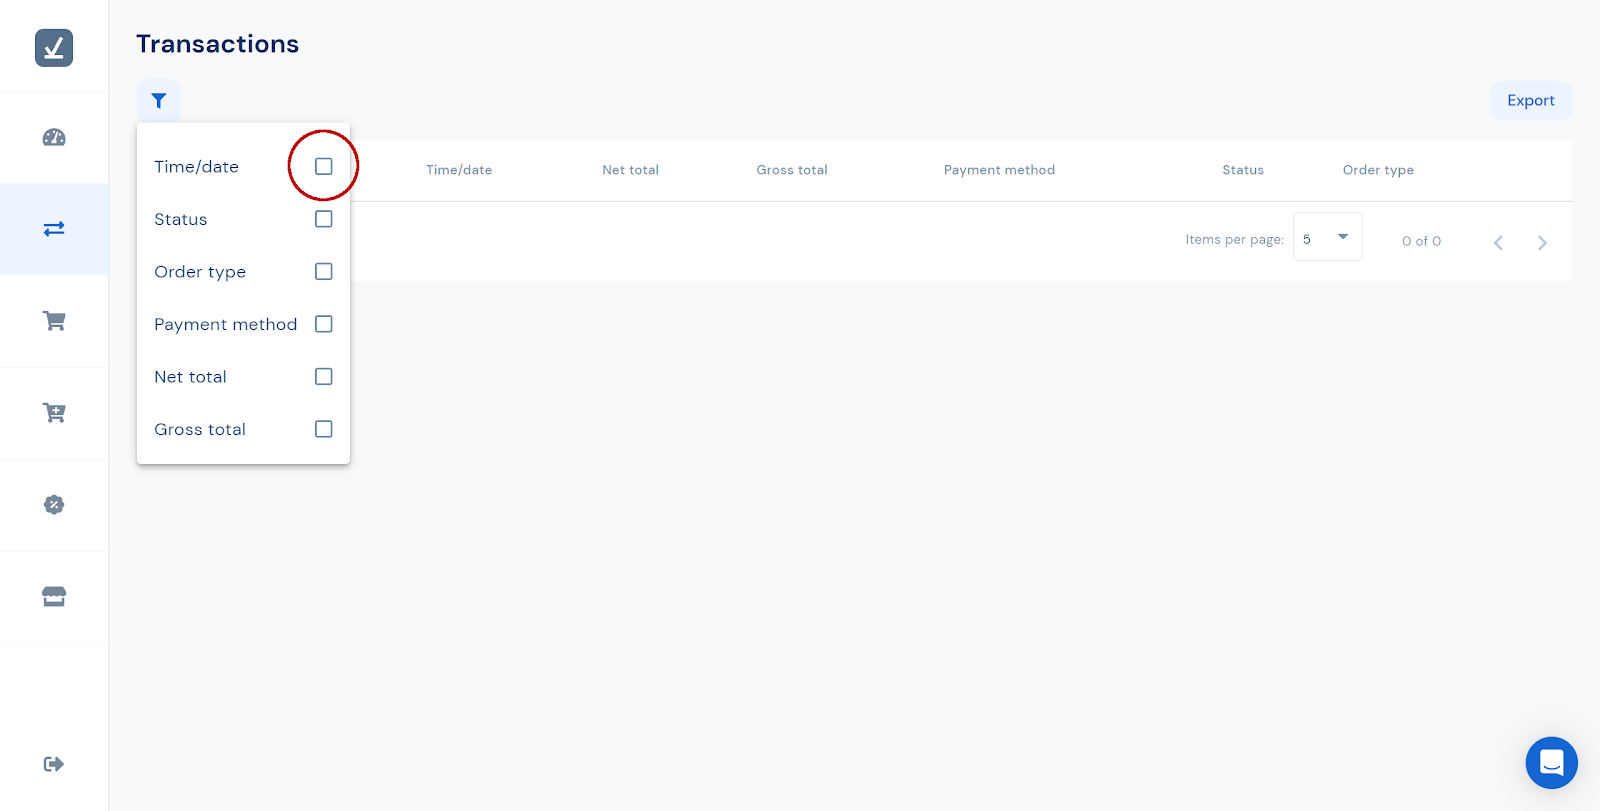
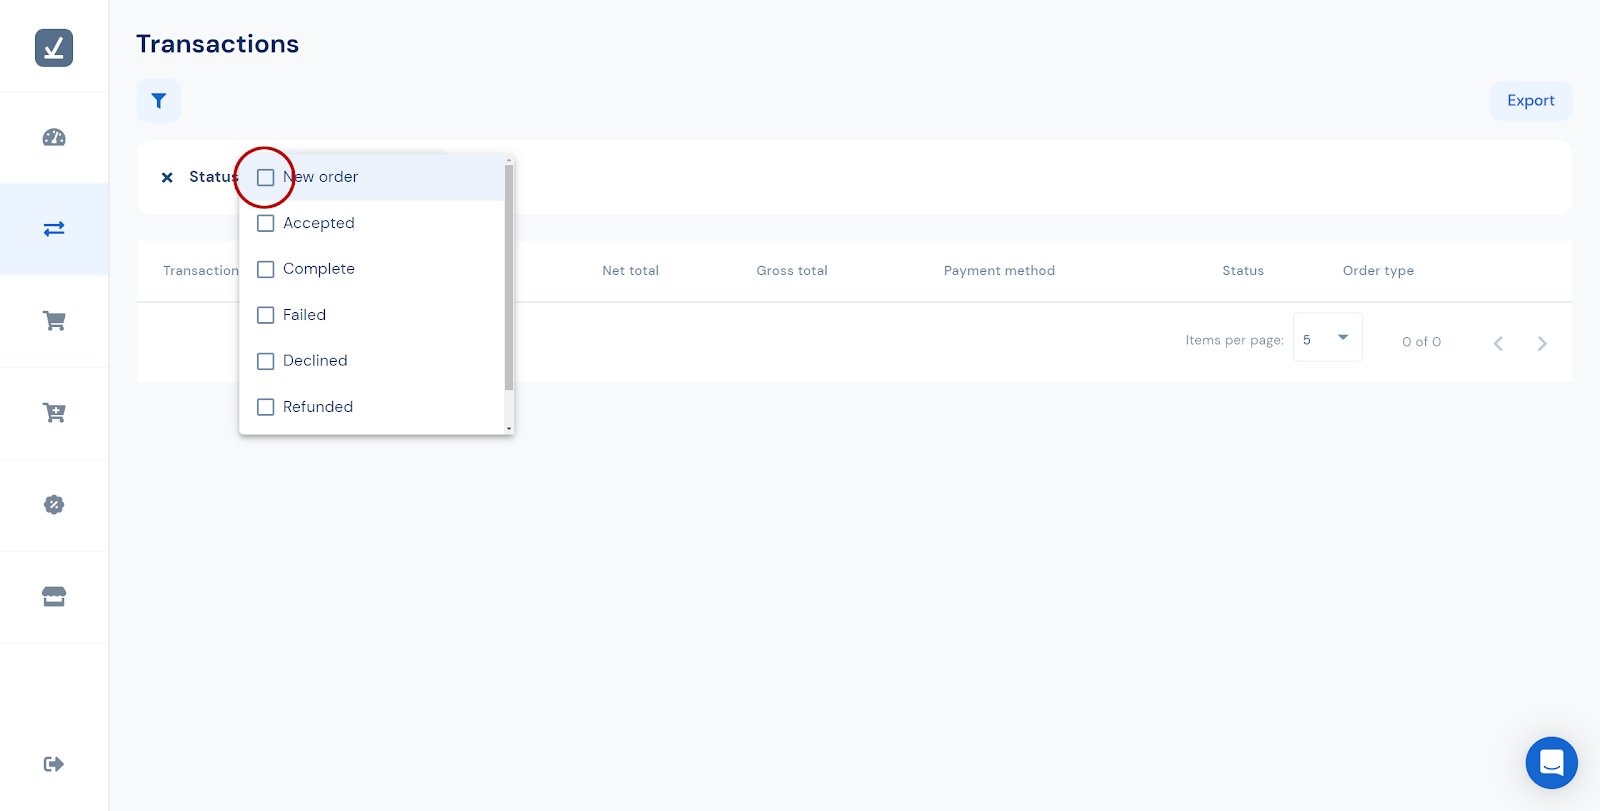
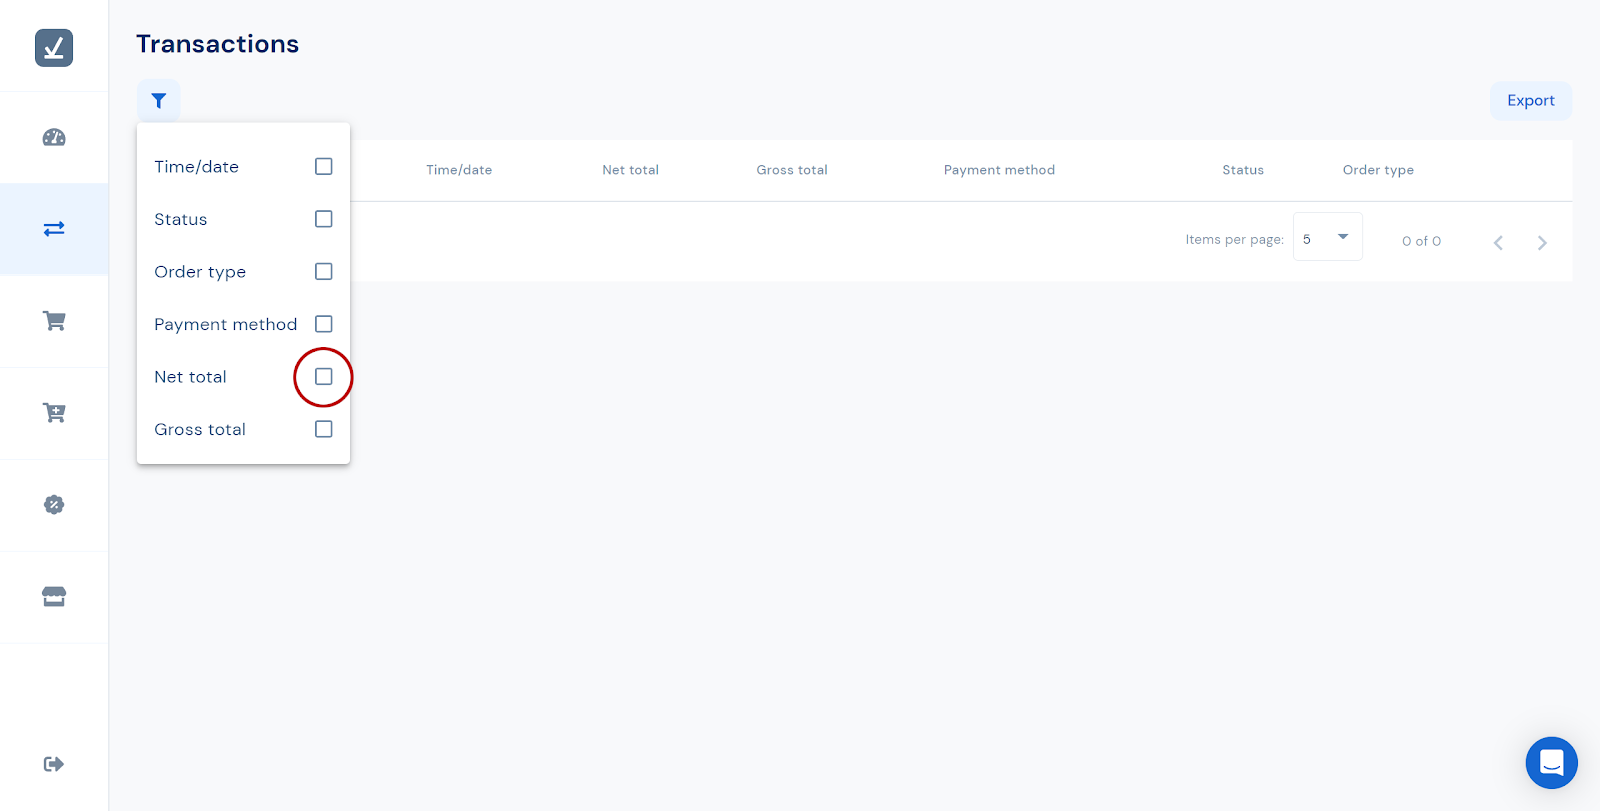
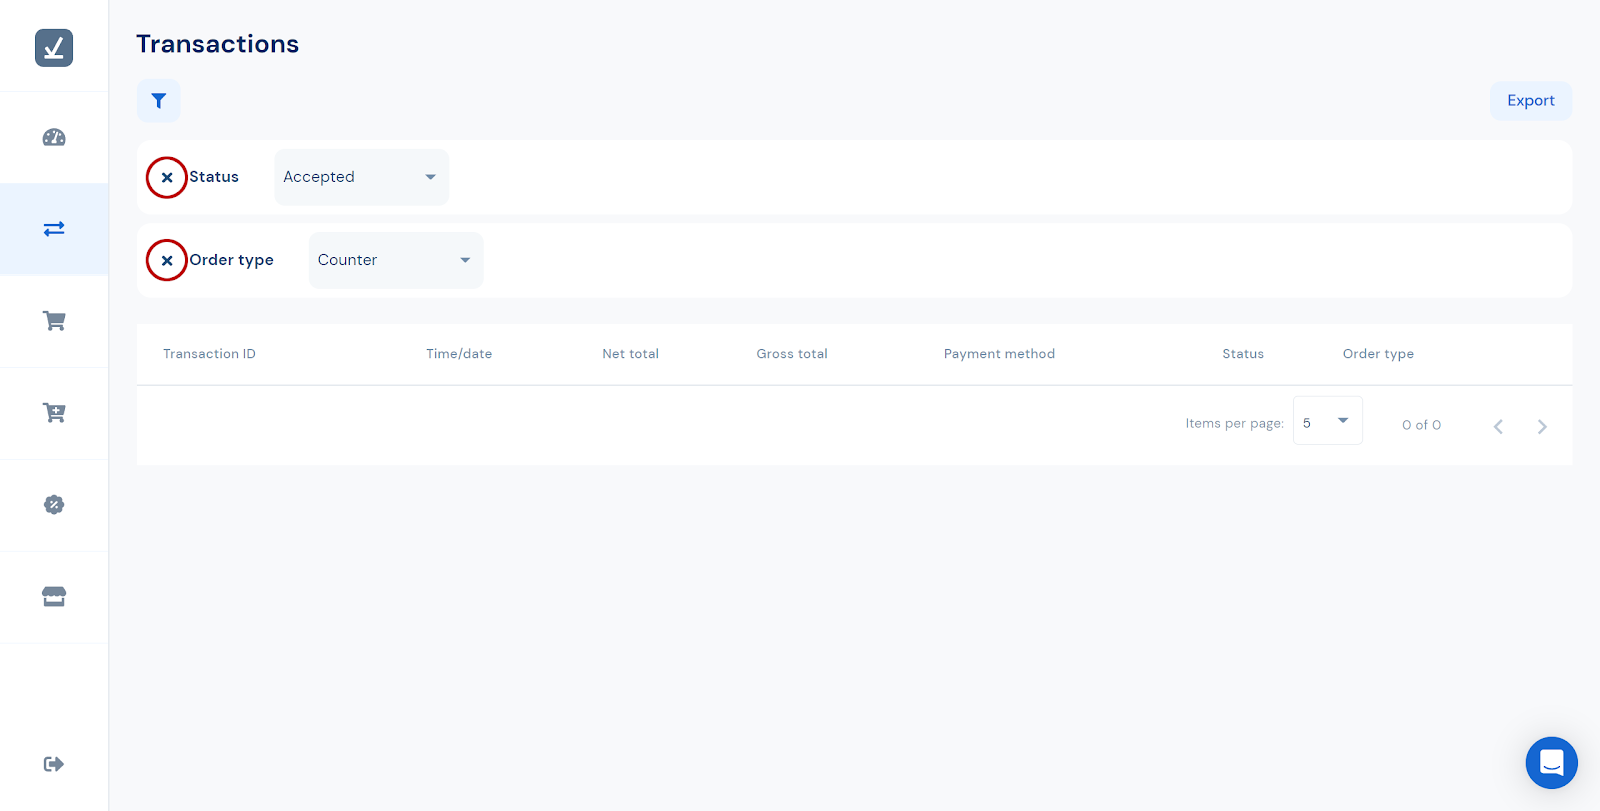
Other filters can be used to help you find the transactions you are looking for. These filters can be used in combination with each other or on their own.
The other filters you can use are by:


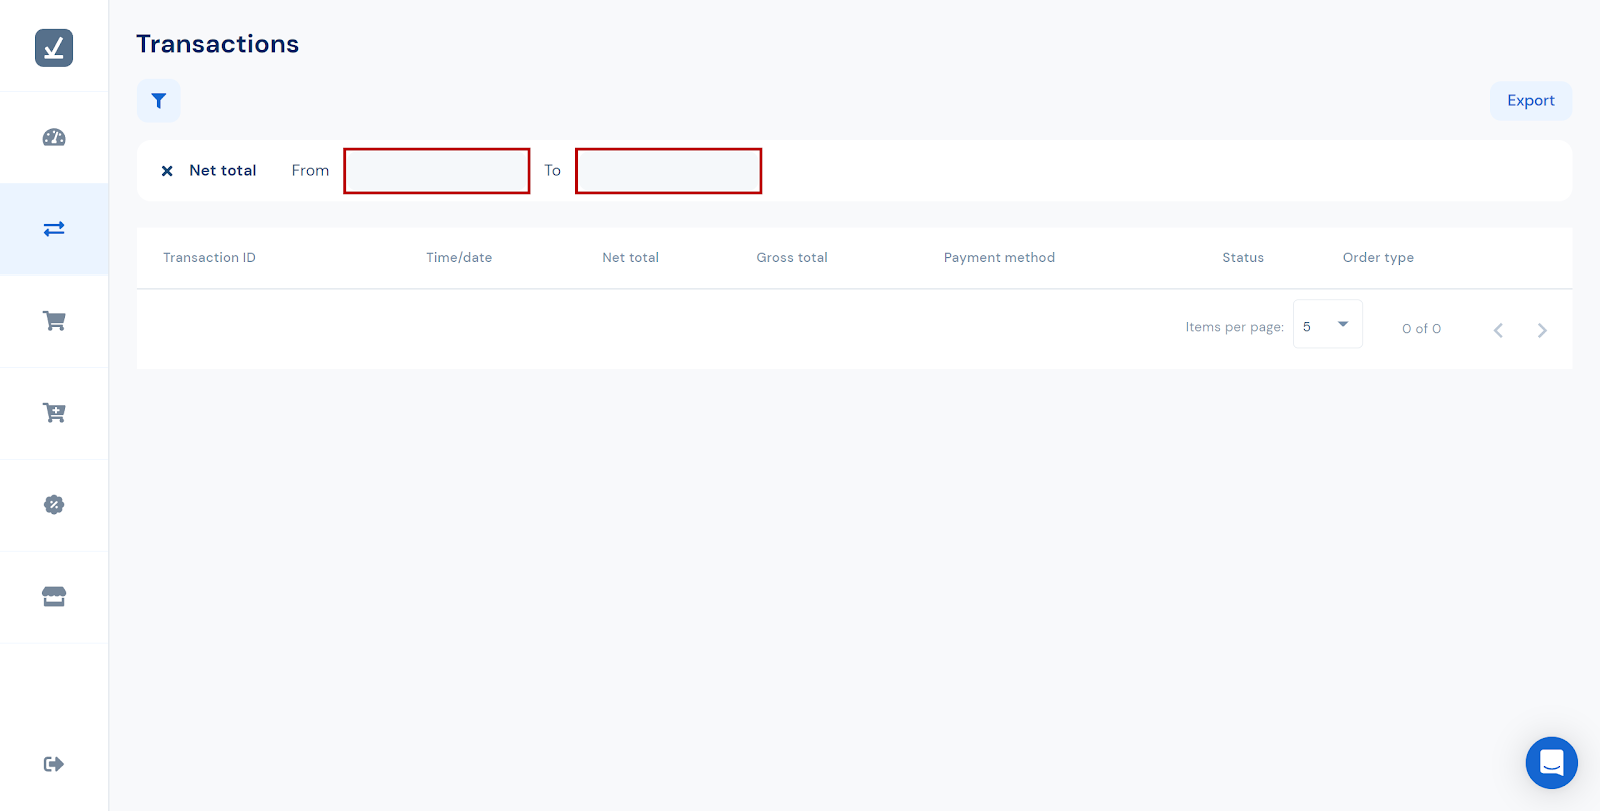
To filter out transactions higher than a certain value, click the To box (right) and type in that value.
The filter will be applied as you type. These filters can be used on their own or together.
To remove a filter click the cross to the left of the name of the filter that you wish to remove.
If you have any doubts about the transactions on your report please contact us and a member of our team will be happy to assist you. This can be done via WhatApp, email or our Online Chat. For more information see: How do I get in contact with someone at Kody for assistance?
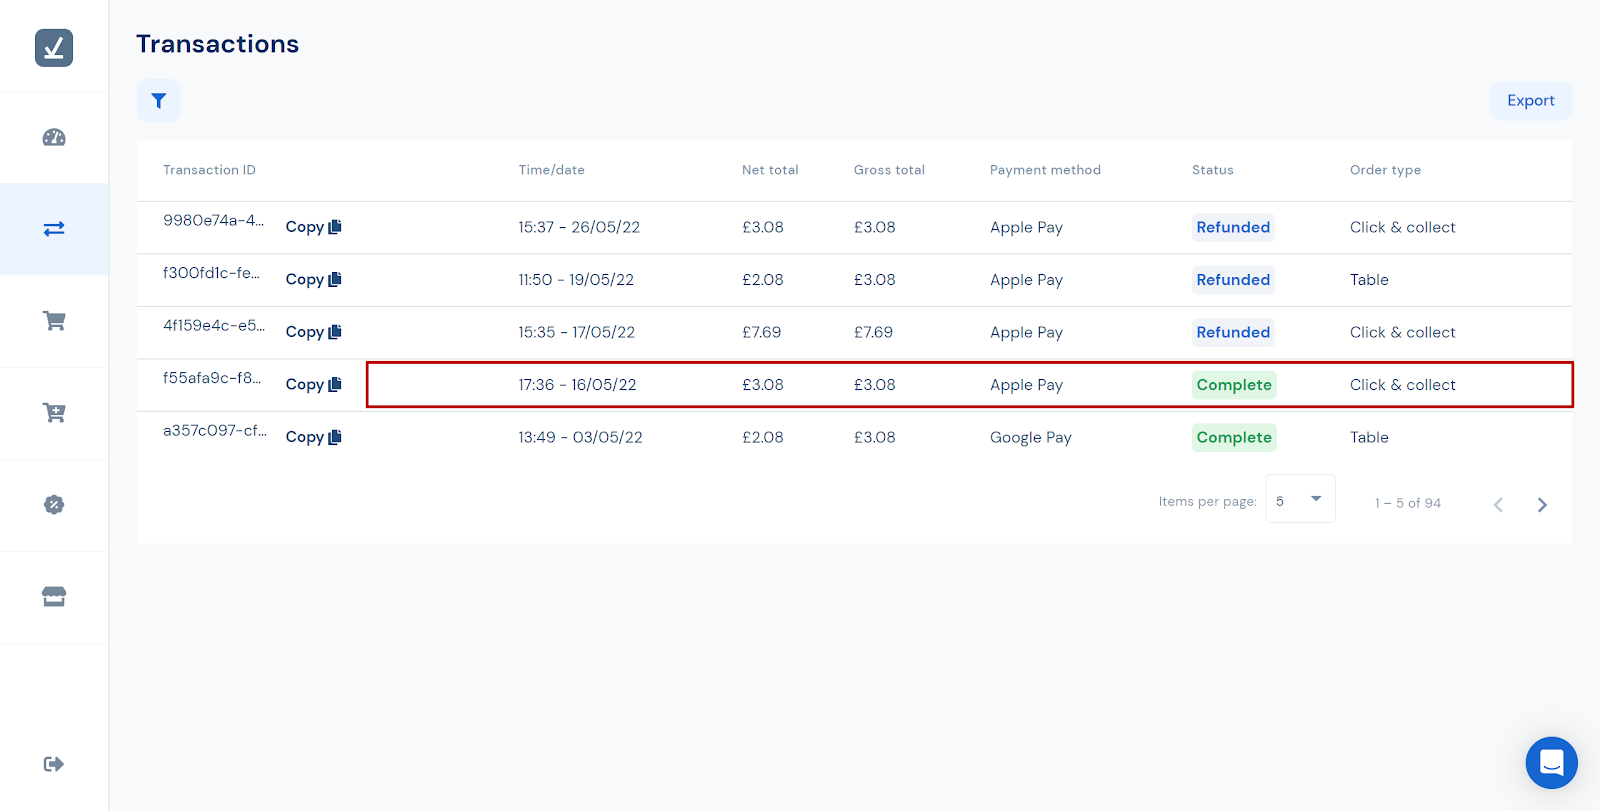
Find the transaction you would like to refund. The transactions are listed with the newest at the top and the oldest at the bottom (reverse chronological order). The transactions shown can be filtered to make it easier to find the transaction you are looking for. For more information about how to filter the transactions see:
How do I get my transactions for this Day / Week / Month?
How else can I control what is on my transaction report?
Once you have found the transaction:
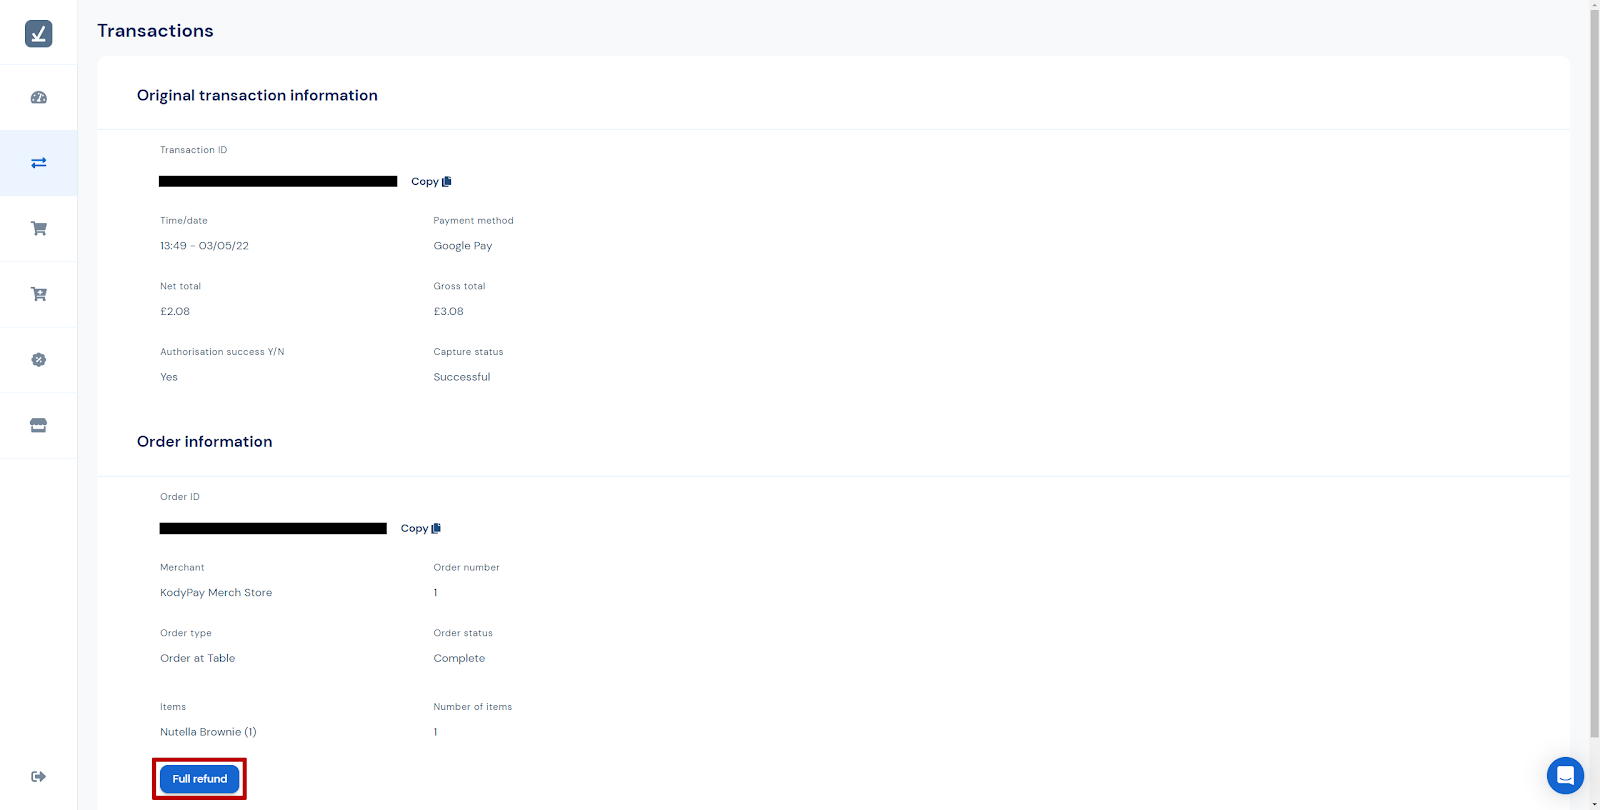
If you have any concerns or issues with processing the refund please contact us and a member of our team will be happy to assist you. This can be done via WhatApp, email or our Online Chat. For more information see: How do I get in contact with someone at Kody for assistance?
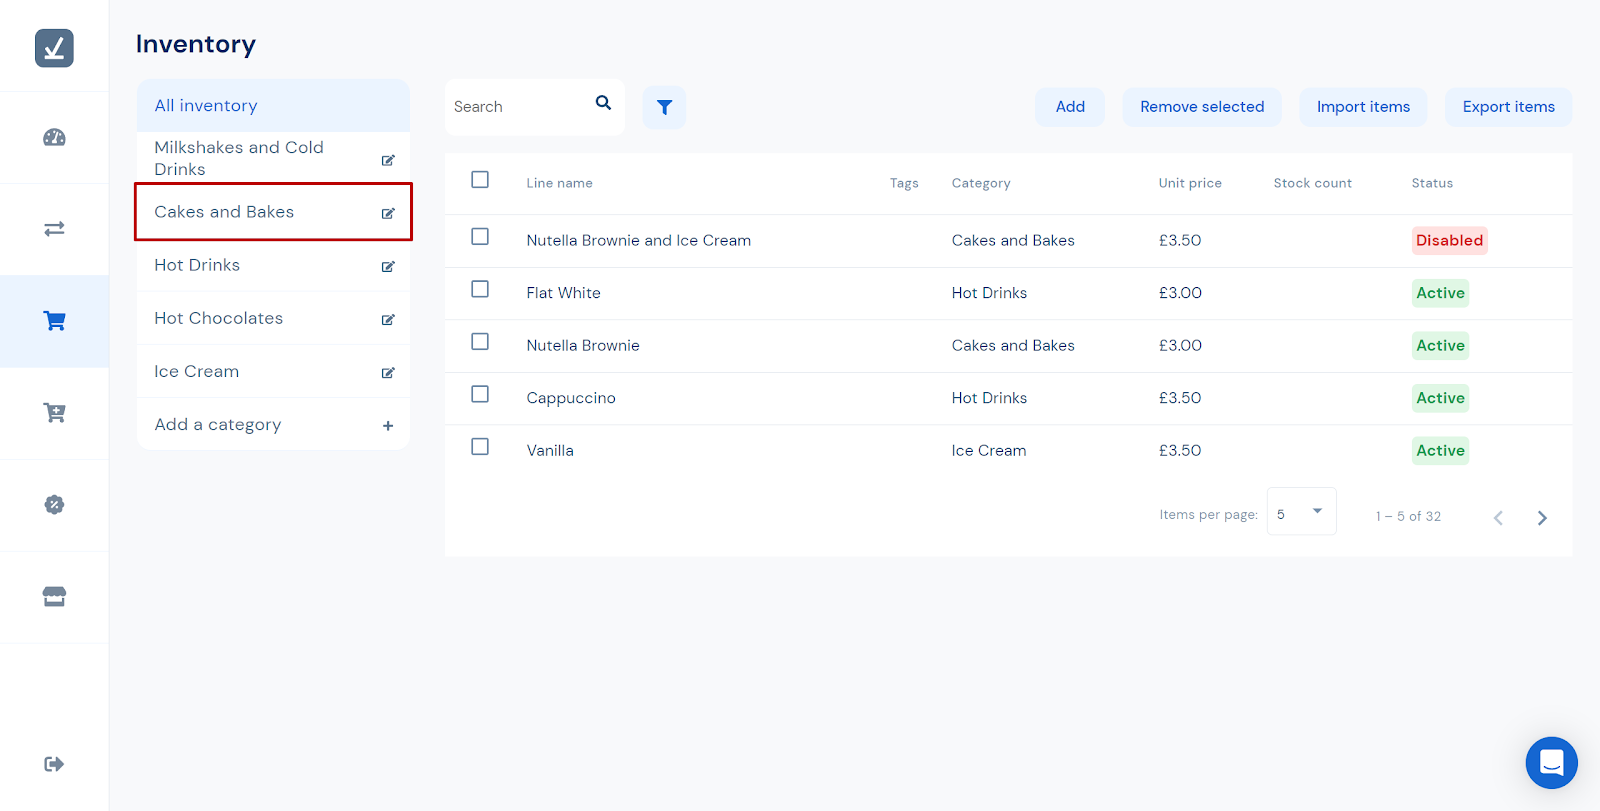
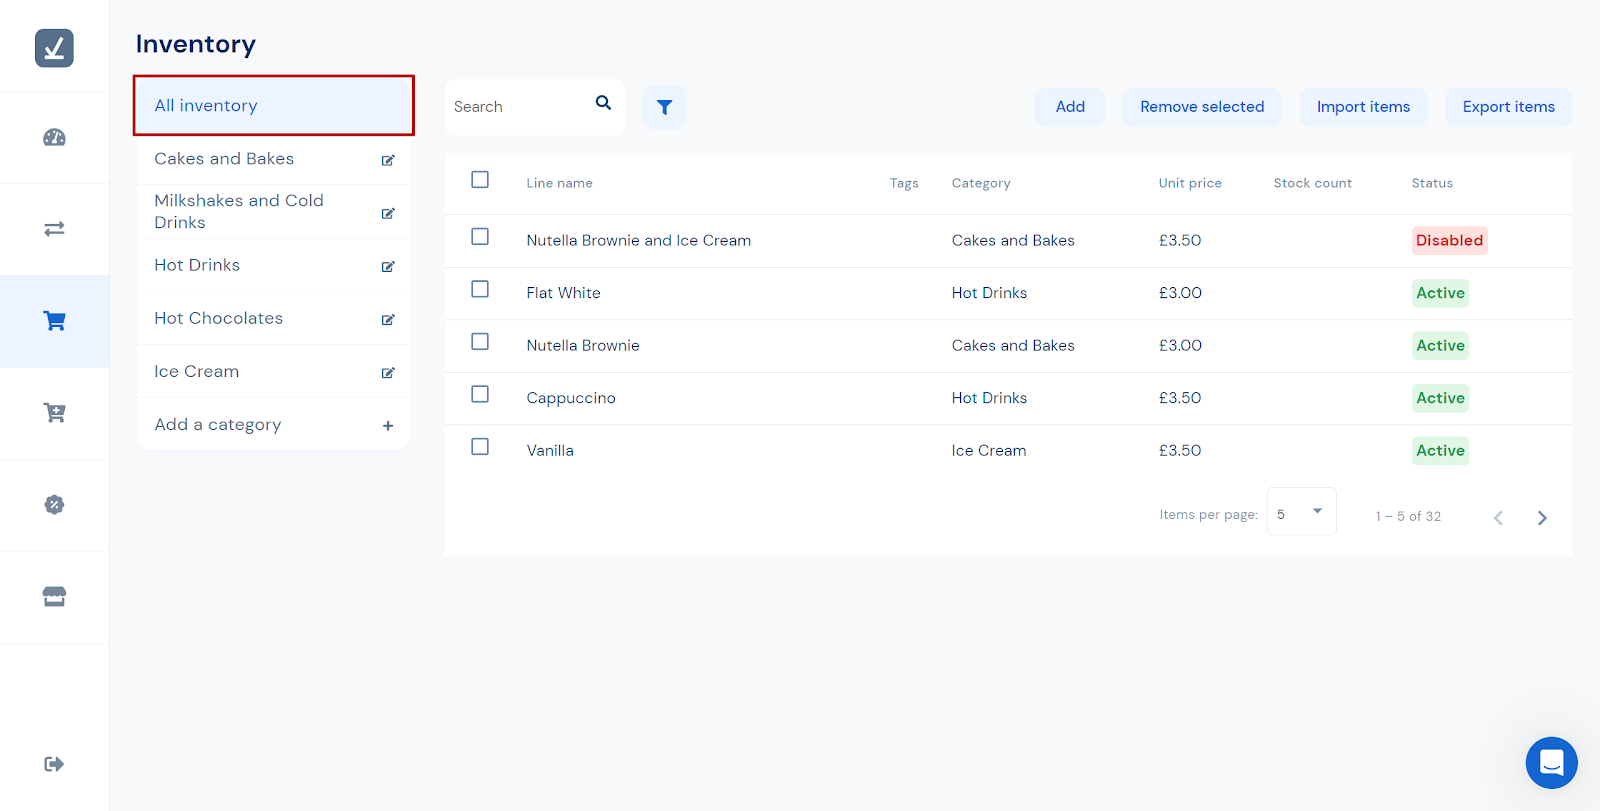
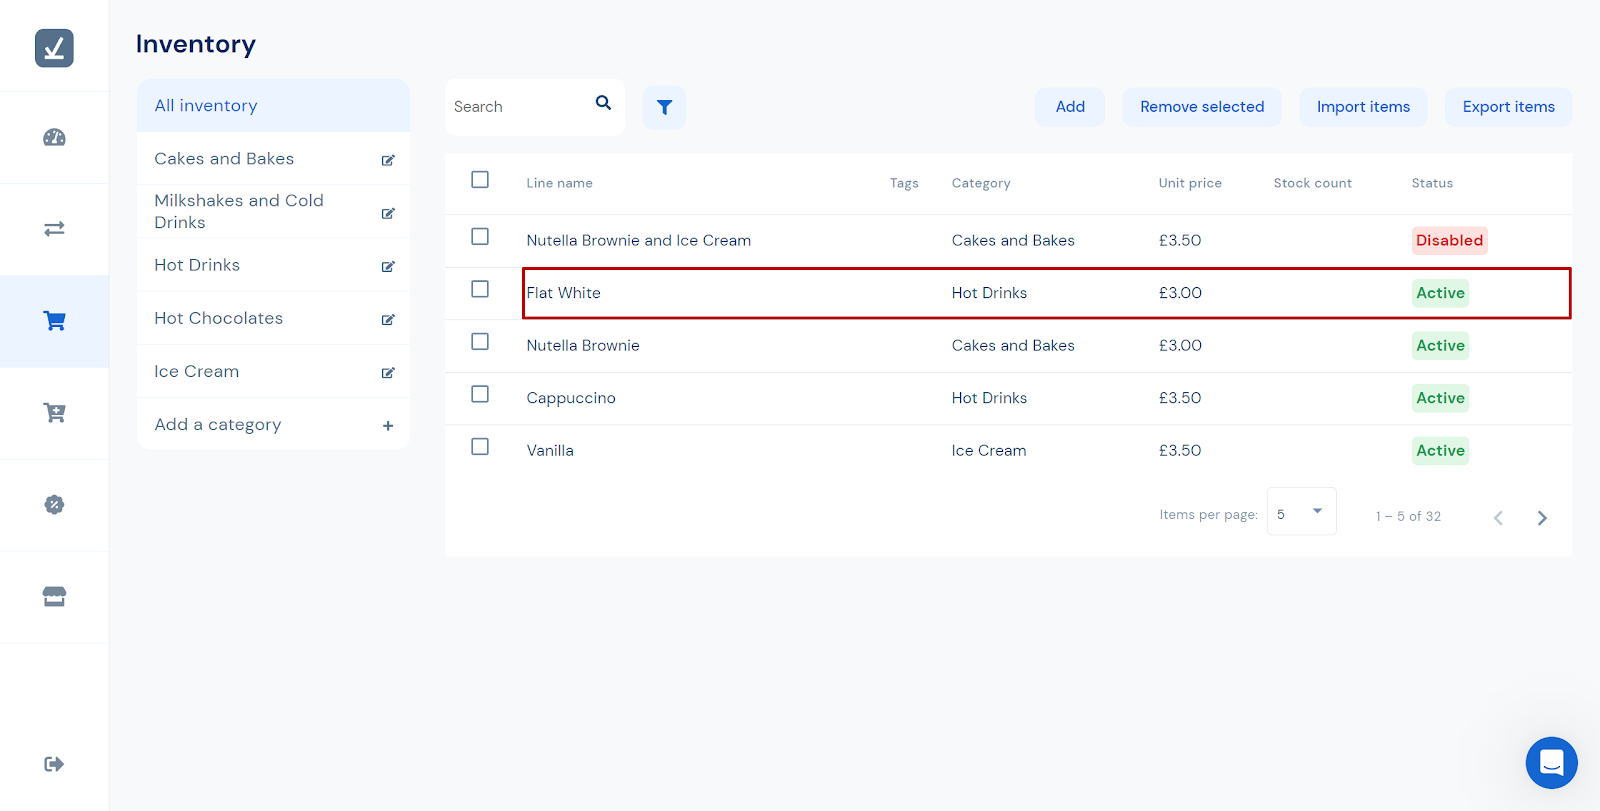
You can get to the ‘Inventory’ page by clicking the fourth icon down on the sidebar on the left. The icon is a shopping trolley.
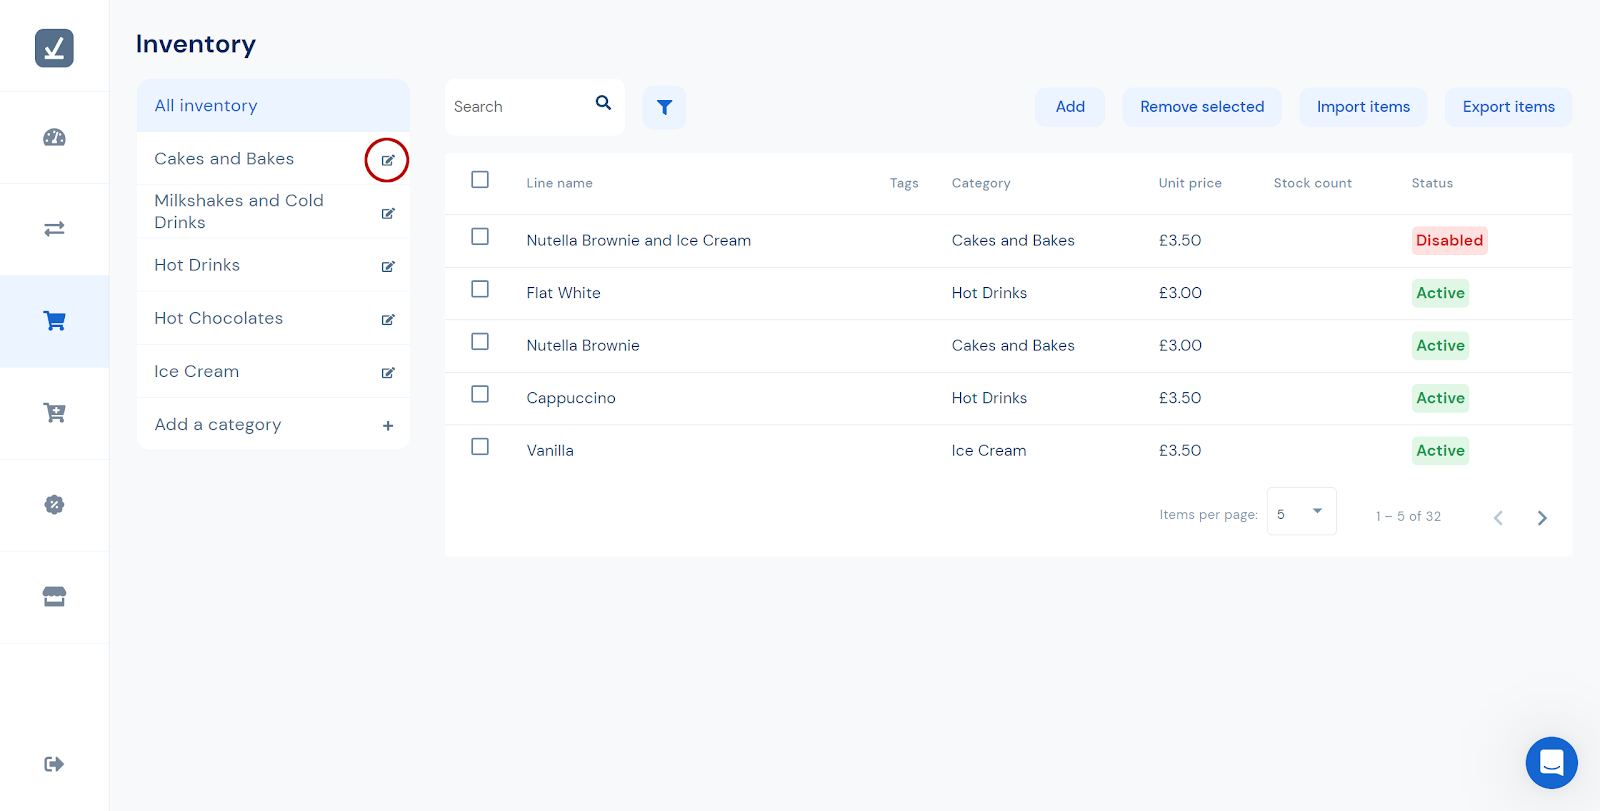
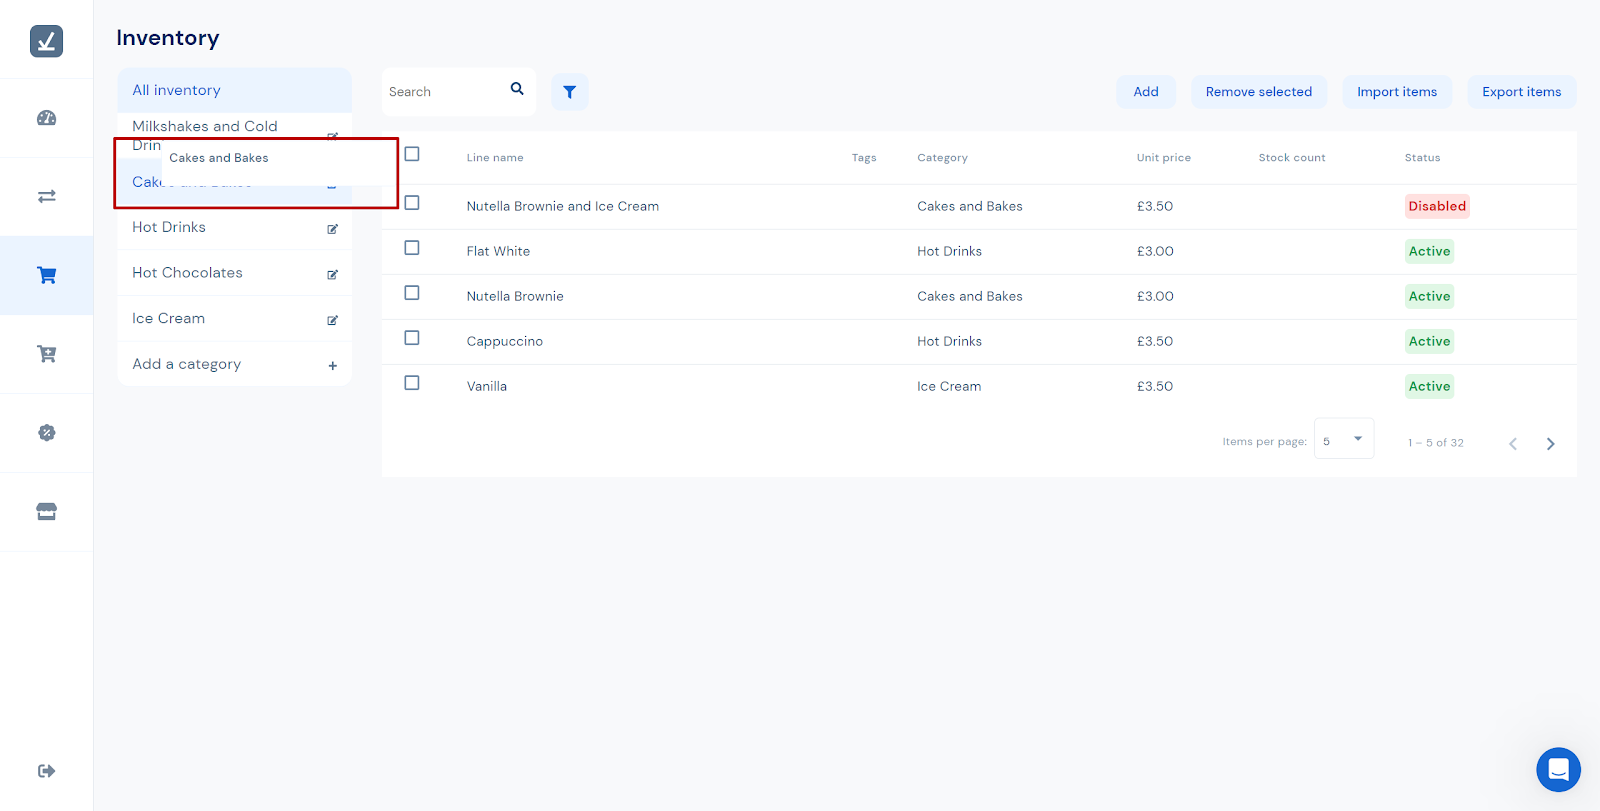
On the left side underneath ‘All Inventory’ is the list of categories. The order they are in on the CMS will be the same order that is shown on the web menu via the QR code. The web menu will list the categories from left to right. To change the order of the categories:
You will see the categories automatically reorder as you drag the box up and down the list. In this example the ‘Cakes and Bakes’ category has been dragged beneath the ‘Milkshakes and Cold Drinks’.
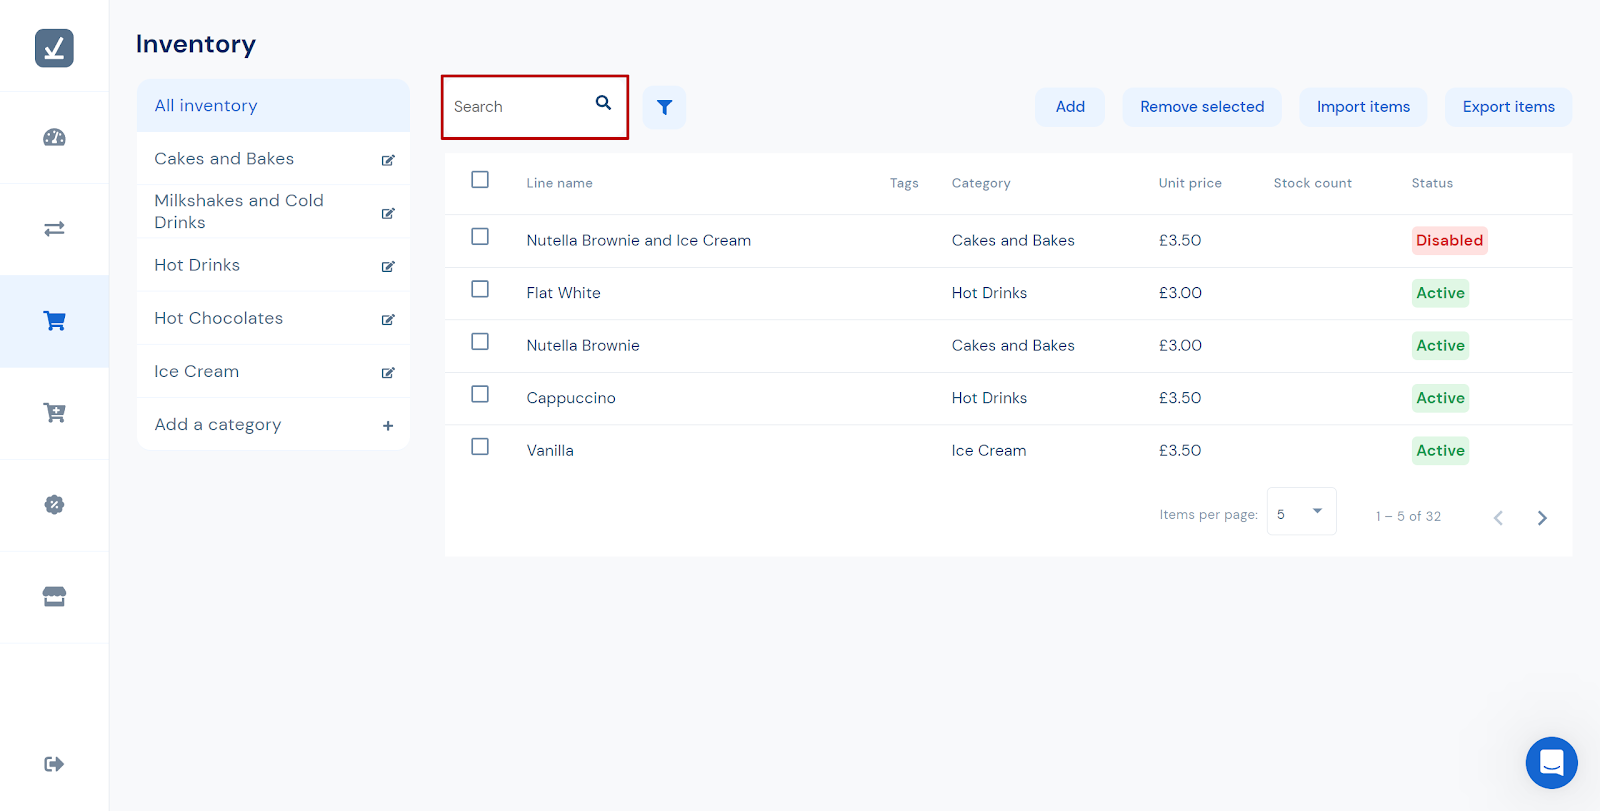
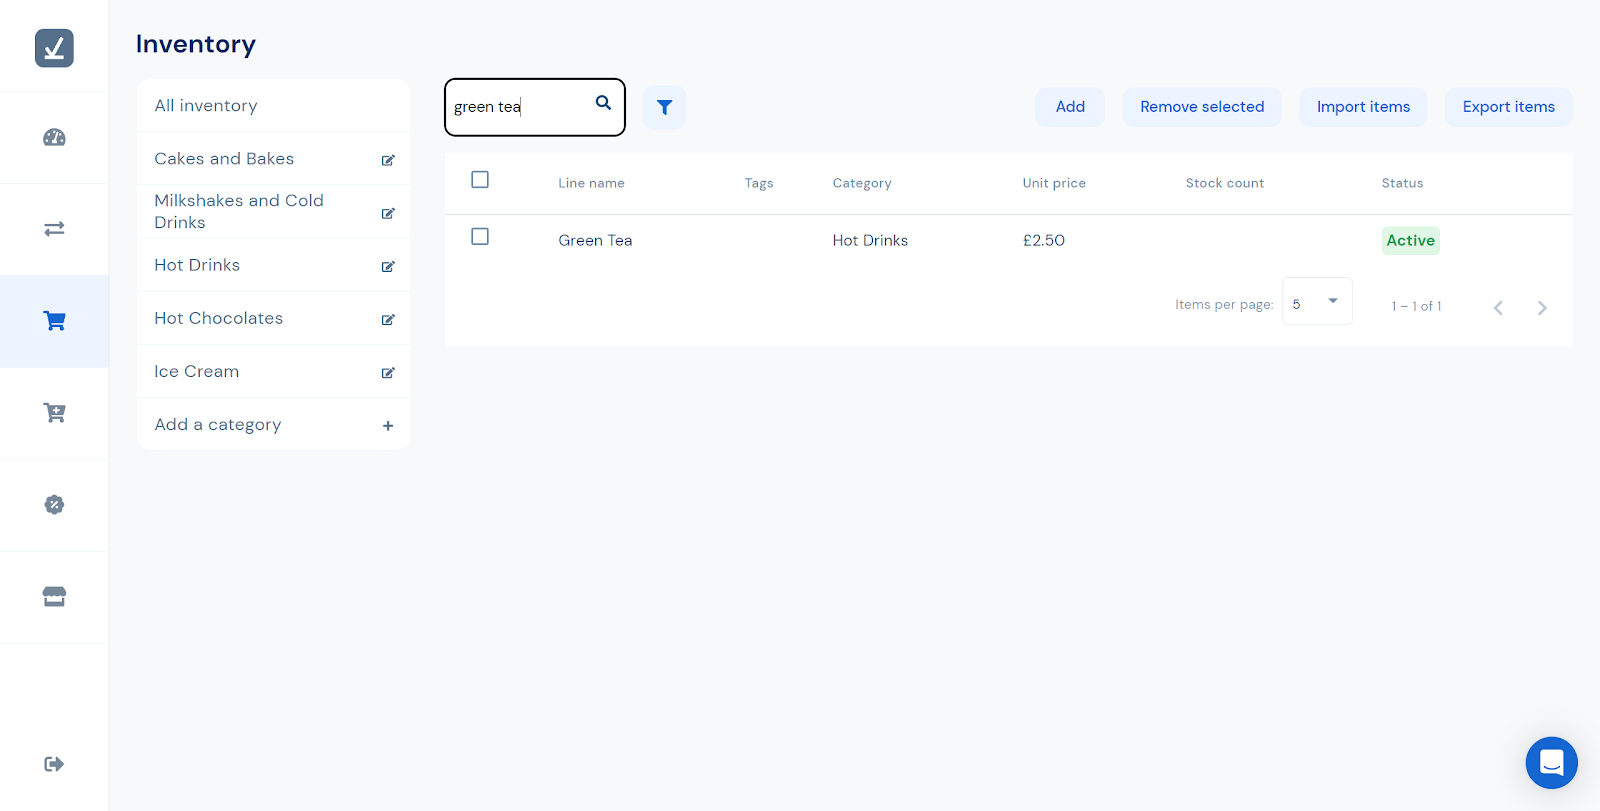
Items can be searched for. To search all items on the menu:
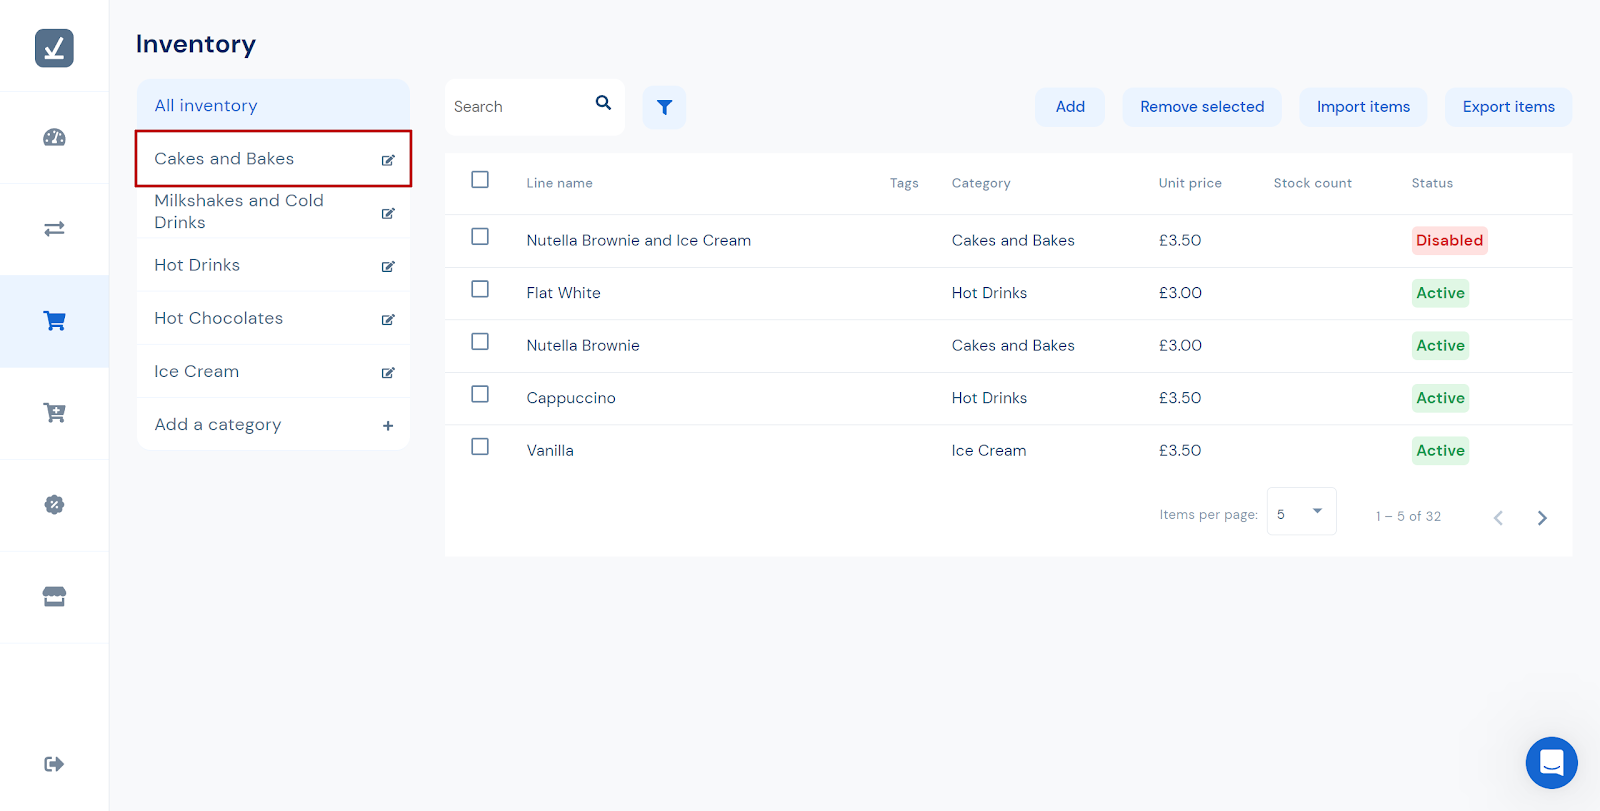
If you know which category the item is in:
Then either:
Search for the item as shown above, this is best for when a category has many items, or manually look for the item from the displayed list, this is best when the category only has a few items. You may find ‘How do I show more items at once?’ and ‘How do I navigate the pages?’ useful.
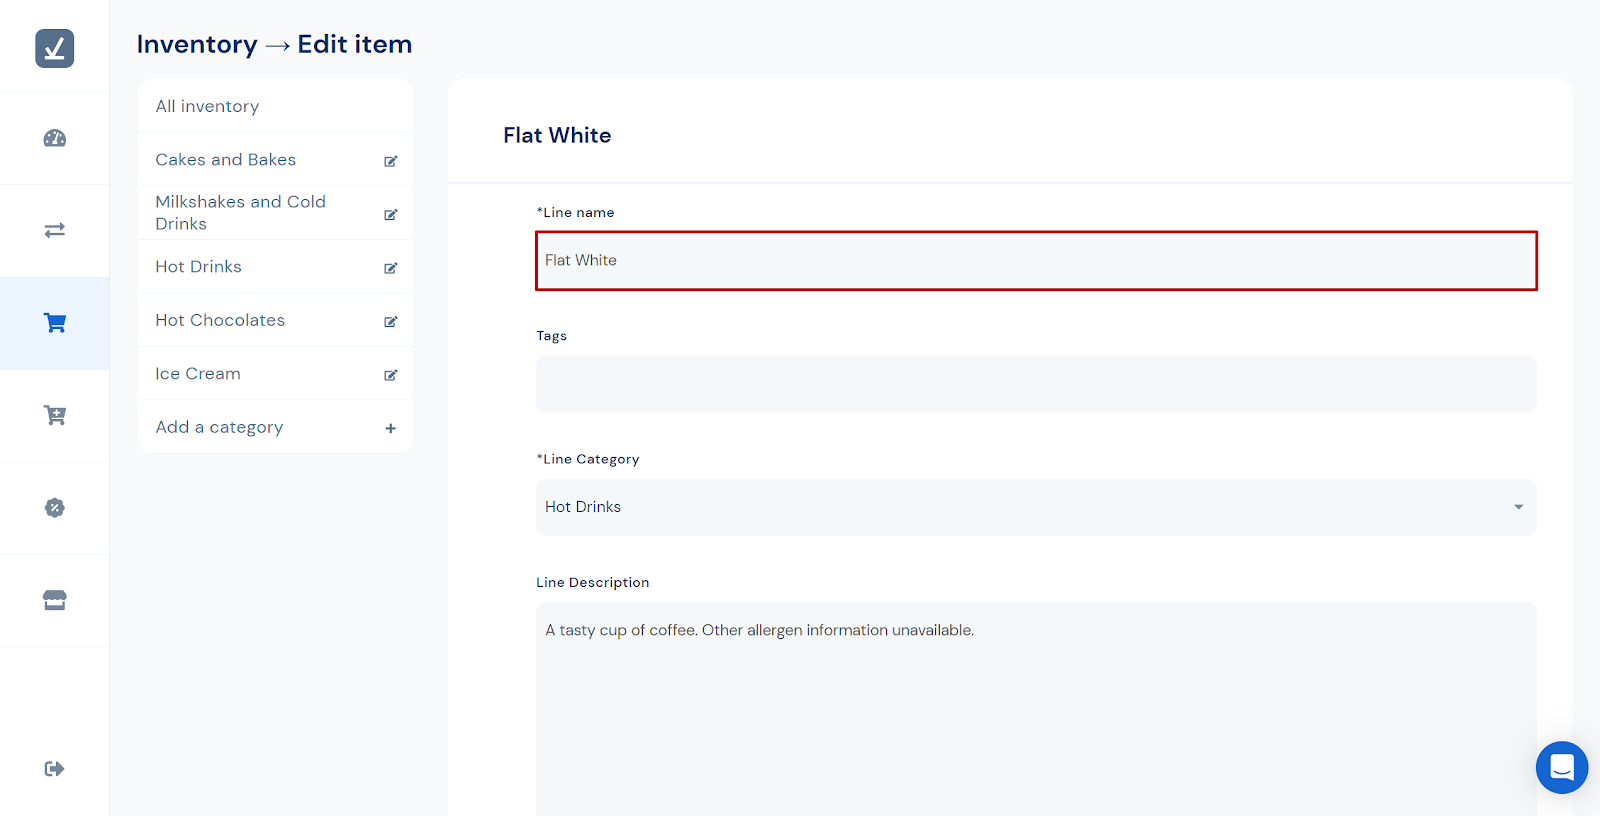
To be able to edit the item, click on the item you wish to update. In this example Flat White will be selected.
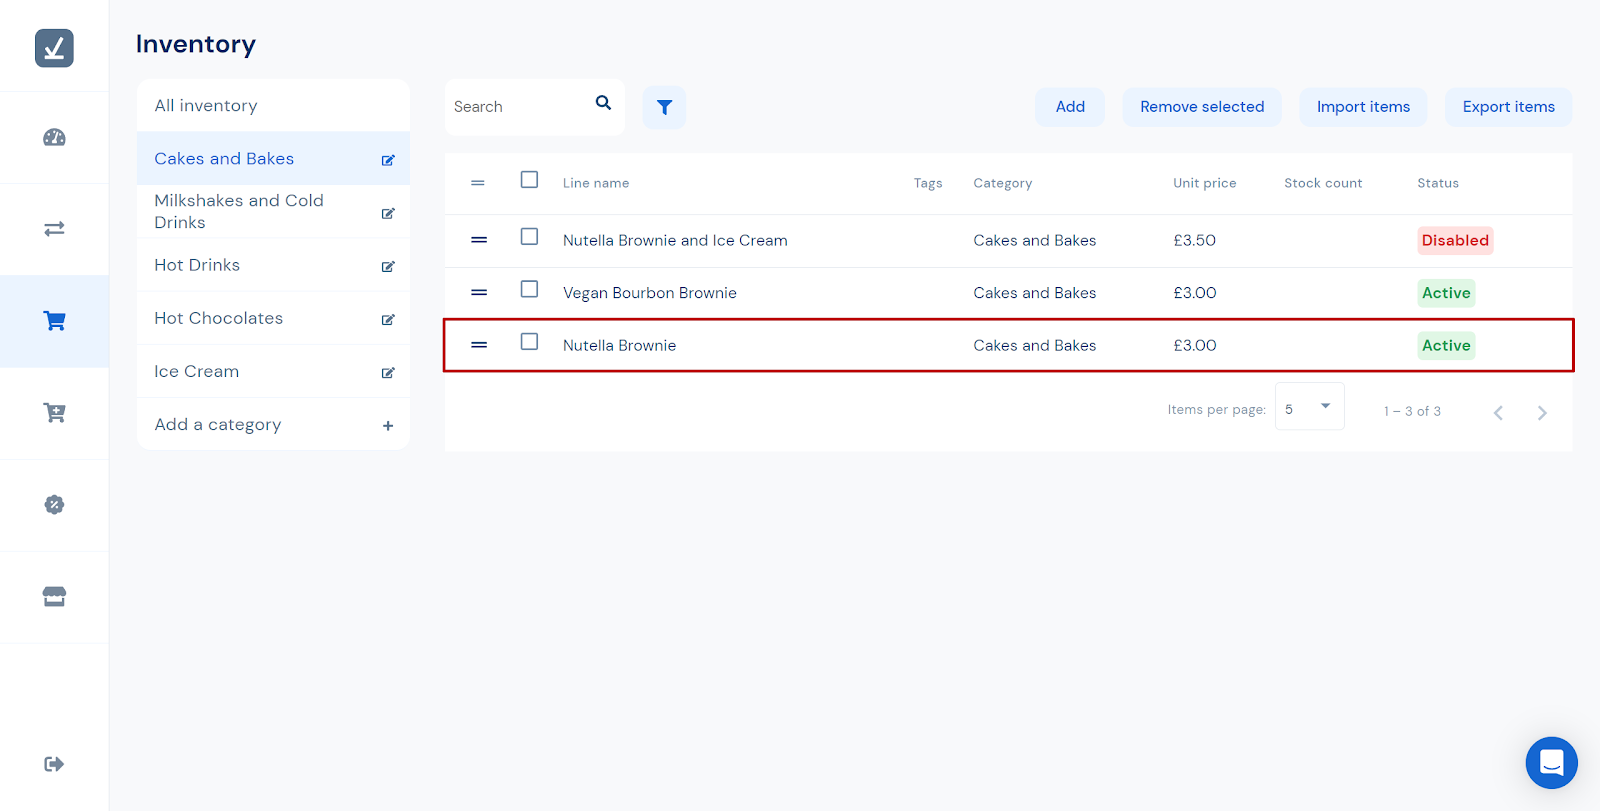
Find the item that you want to change and click it. See ‘How do I find an item and be able to edit it?’ for help with this.
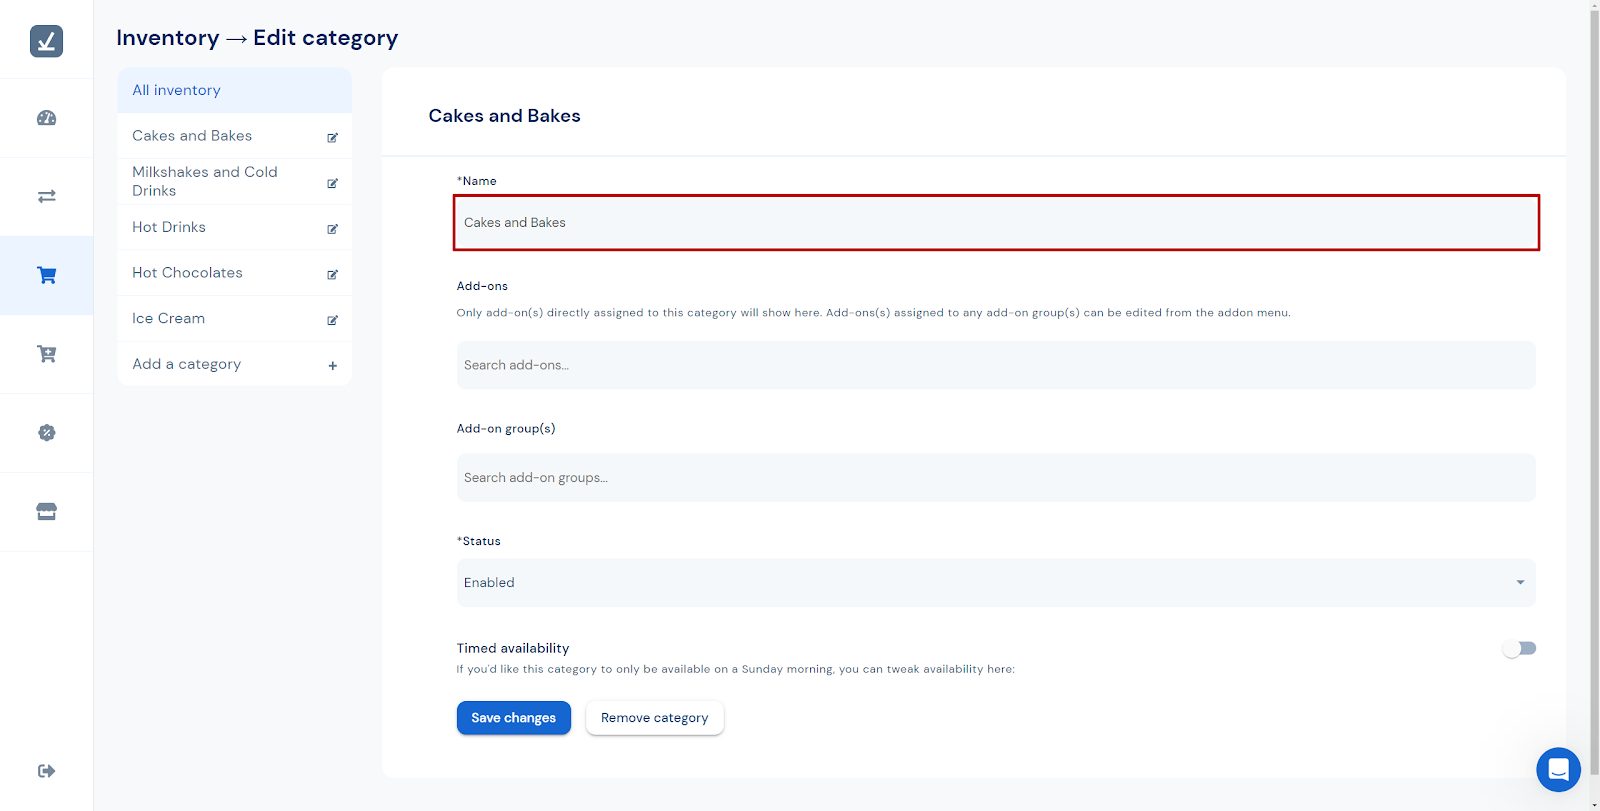
The name can be changed in the top text box underneath *Line name. Changing the text will not update the name of the item on the menu until the Save changes button is clicked. See step three.
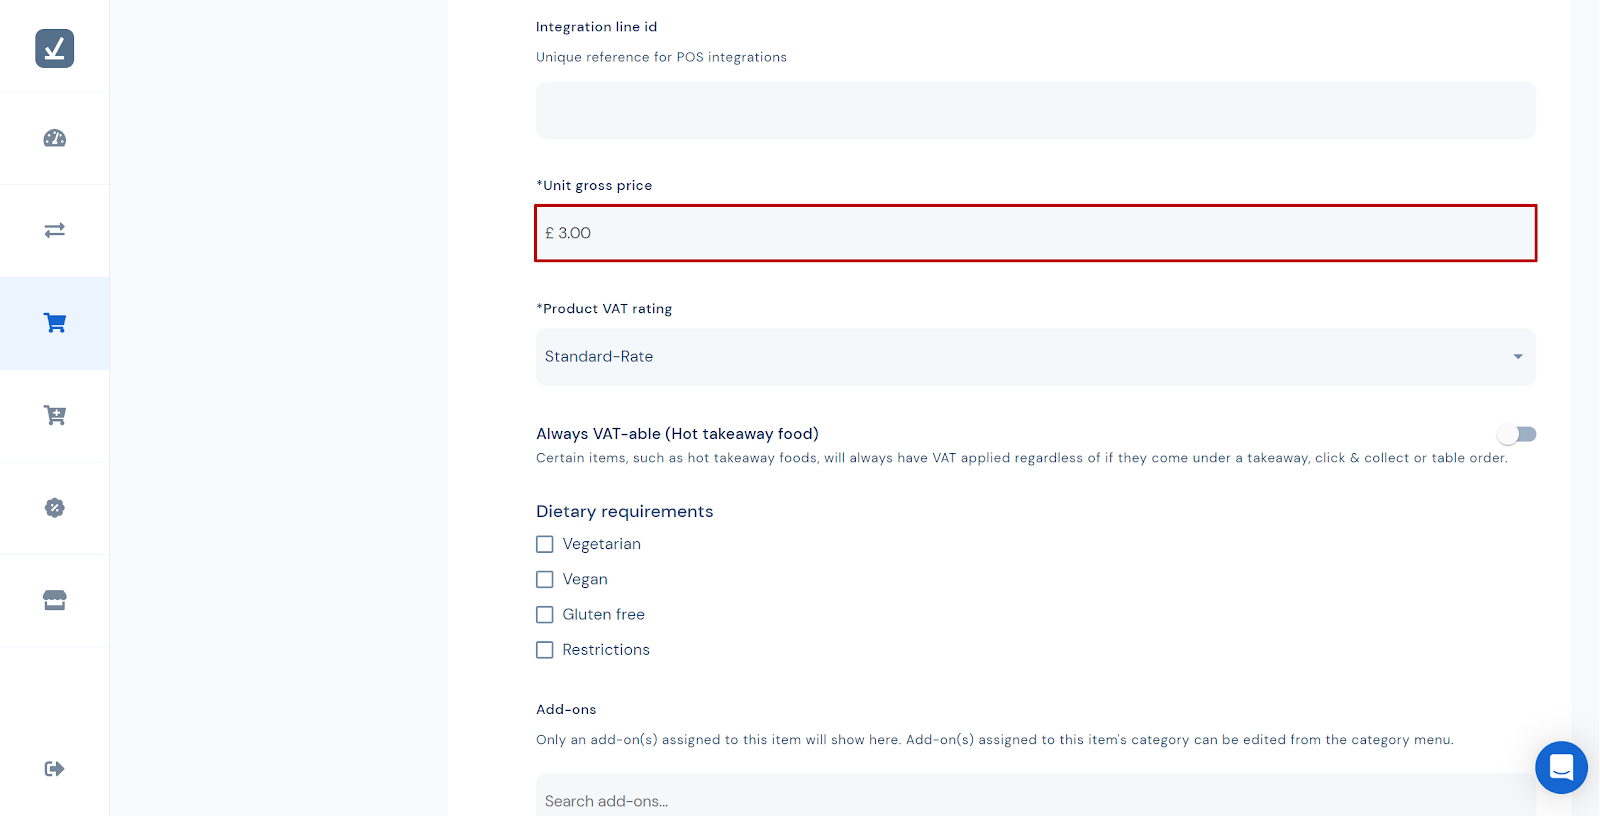
The price can be changed in the text box underneath *Unit gross price. You may need to scroll down the page to see the box. It is about half-way down. Changing the number will not update the price of the item on the menu until the Save changes button is clicked. See step three.
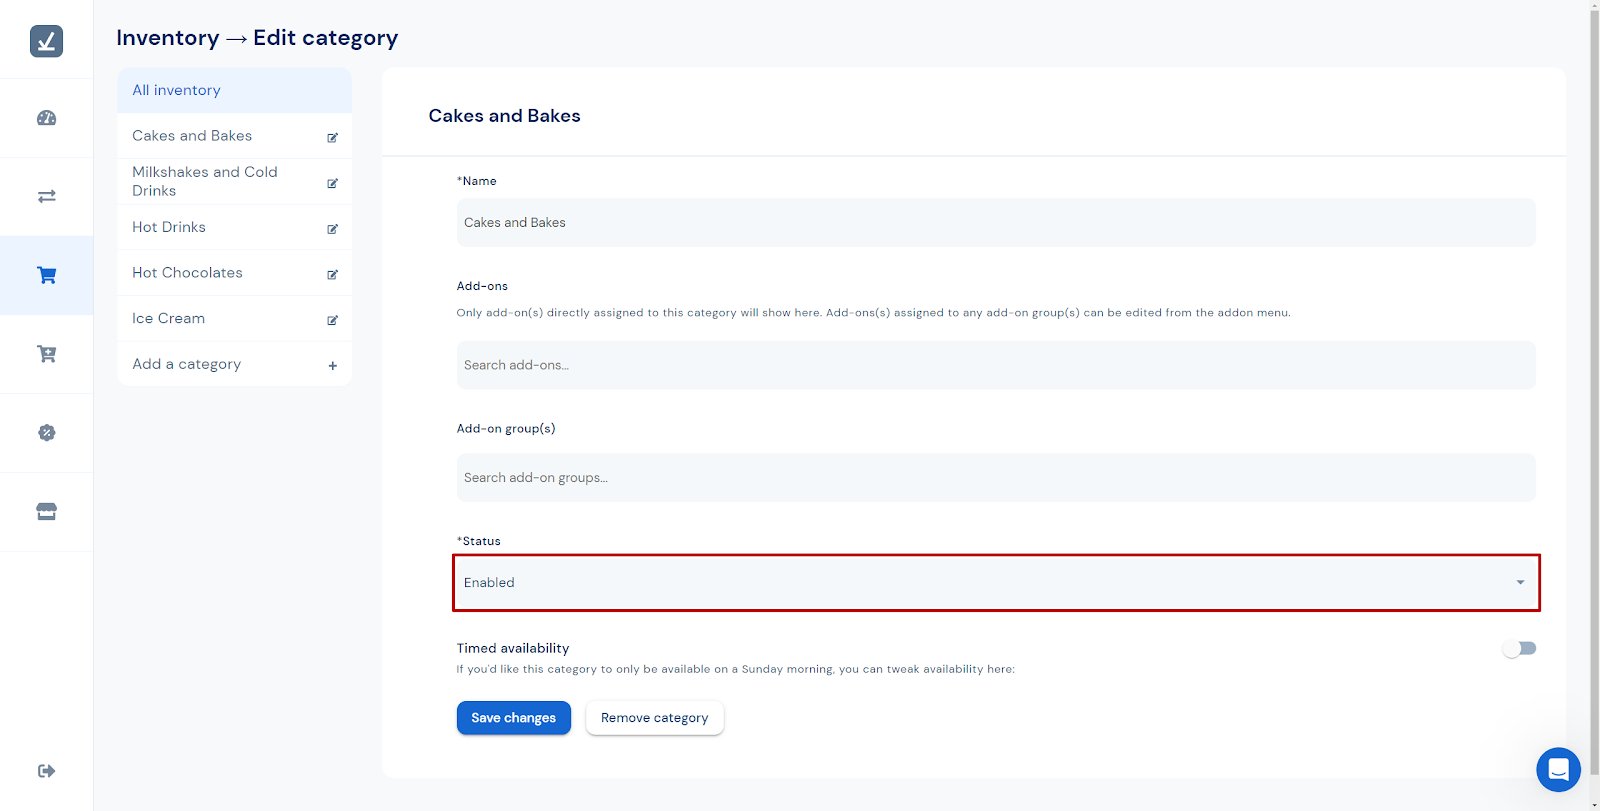
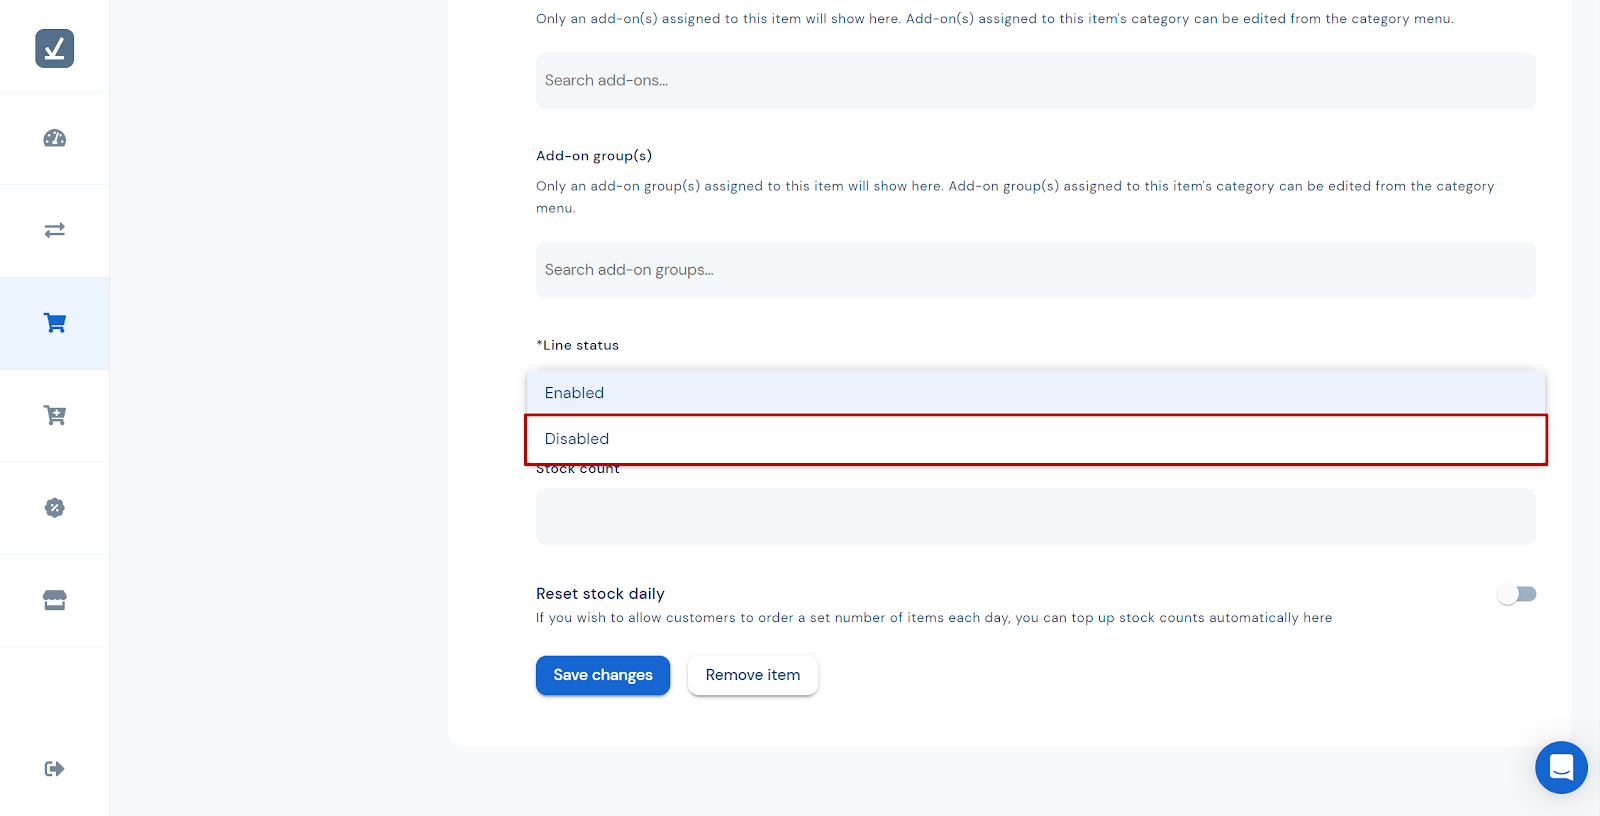
Find the selection box underneath *Line status and click it. You may have to scroll down the page to see the box. It is near the bottom.

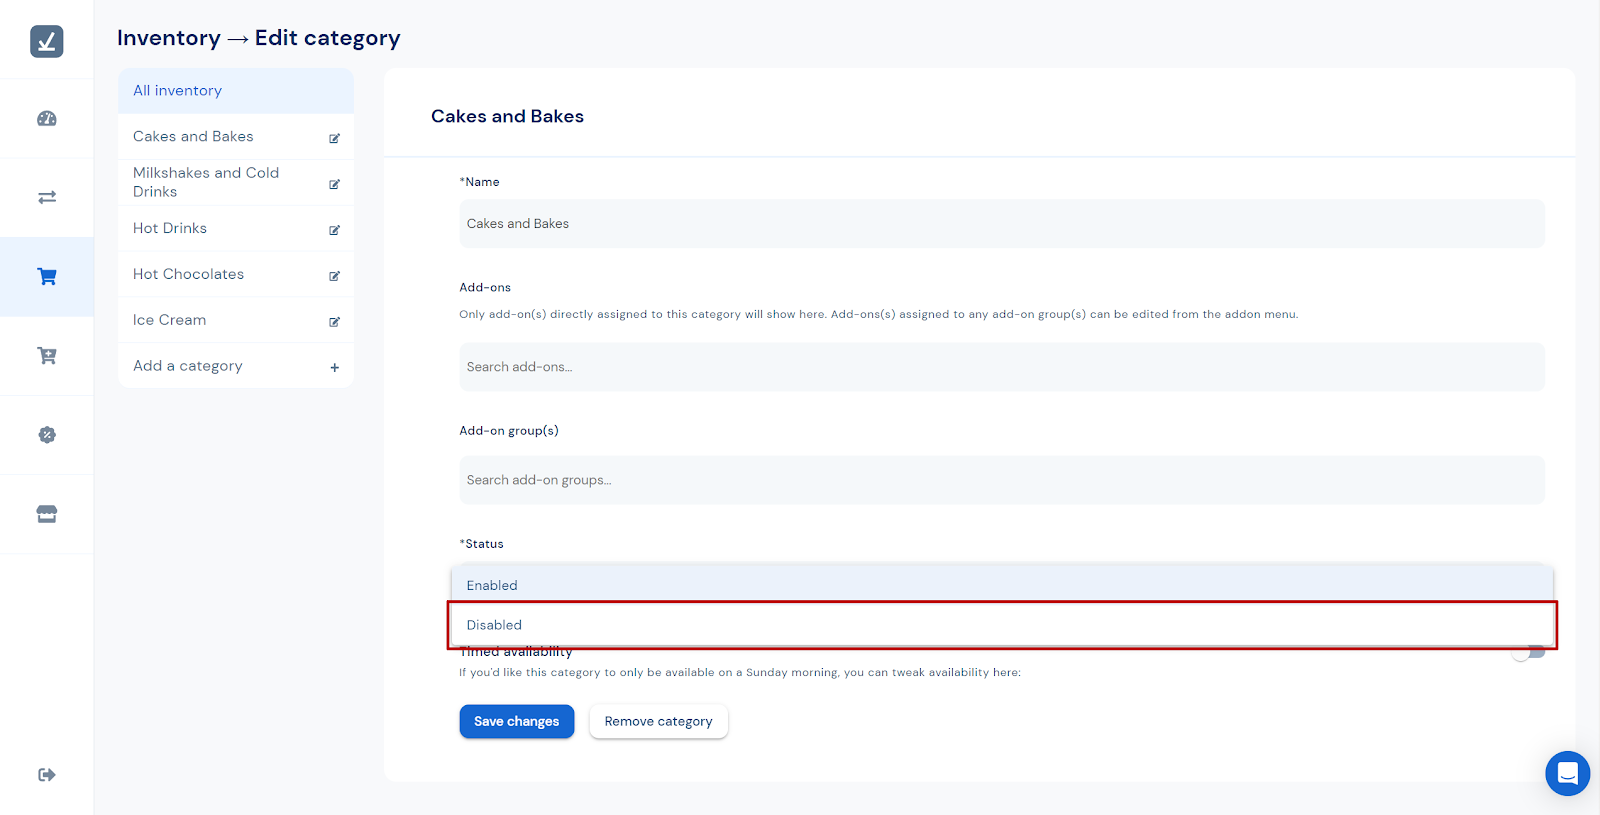
Click either Disabled or Enabled to change the status of the item. In this example the item is already enabled and Disabled has been marked.
The item will not be enabled or disabled on the menu until the Save changes button has been clicked.
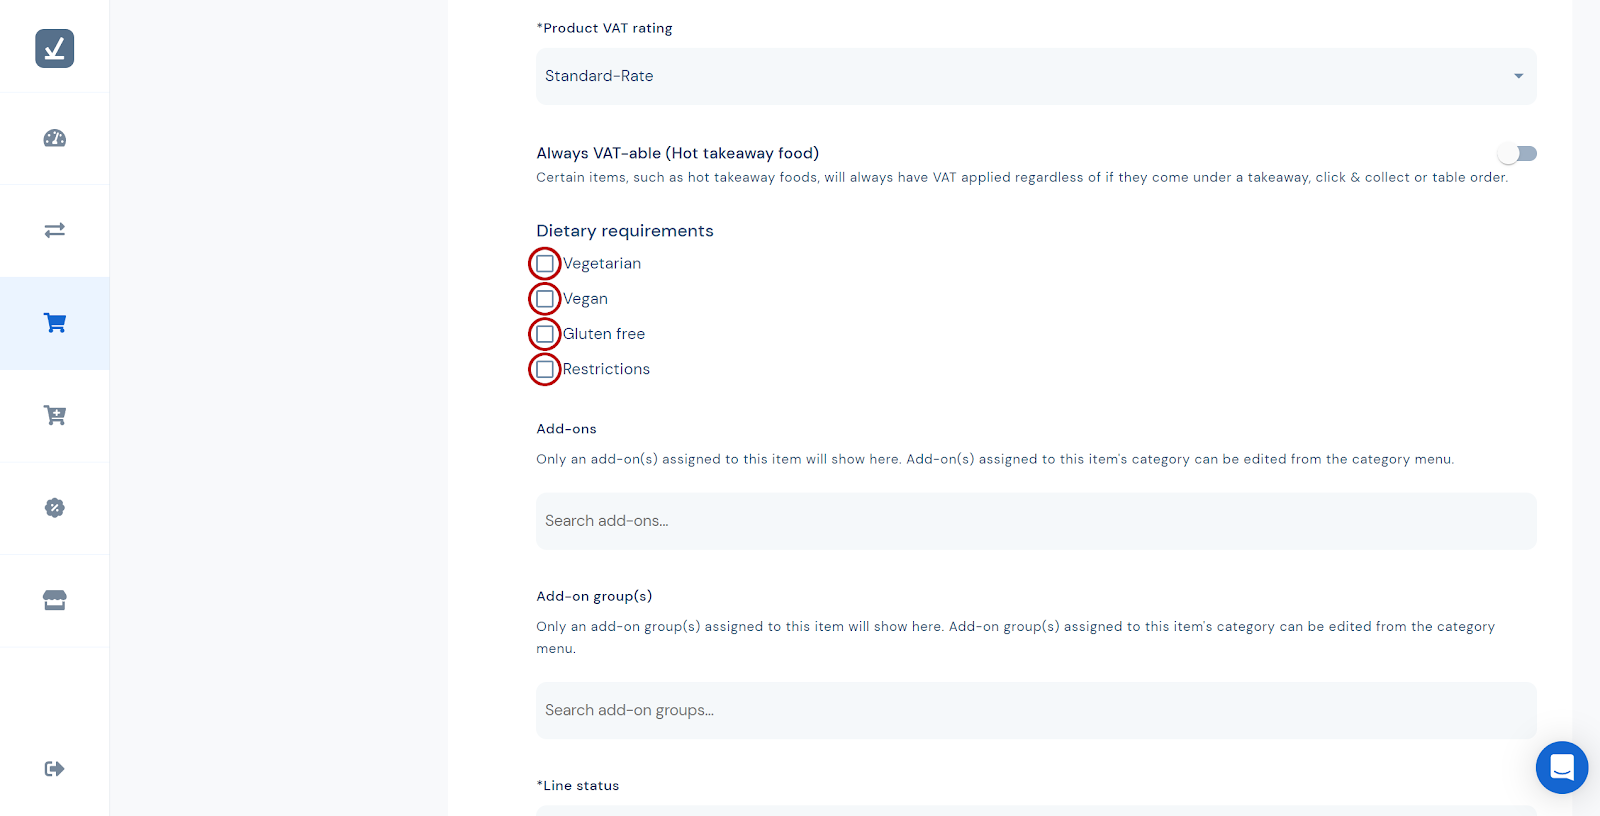
Find the Dietary requirements section. You may have to scroll down the page. It is most of the way down. Here the four possible dietary requirements are listed vertically with checkboxes to the left of them. These have been marked in the screenshot below. Click the checkbox next to the restriction that you want to indicate for that item.
In this example the checkboxes for Vegetarian and Gluten free have been checked.
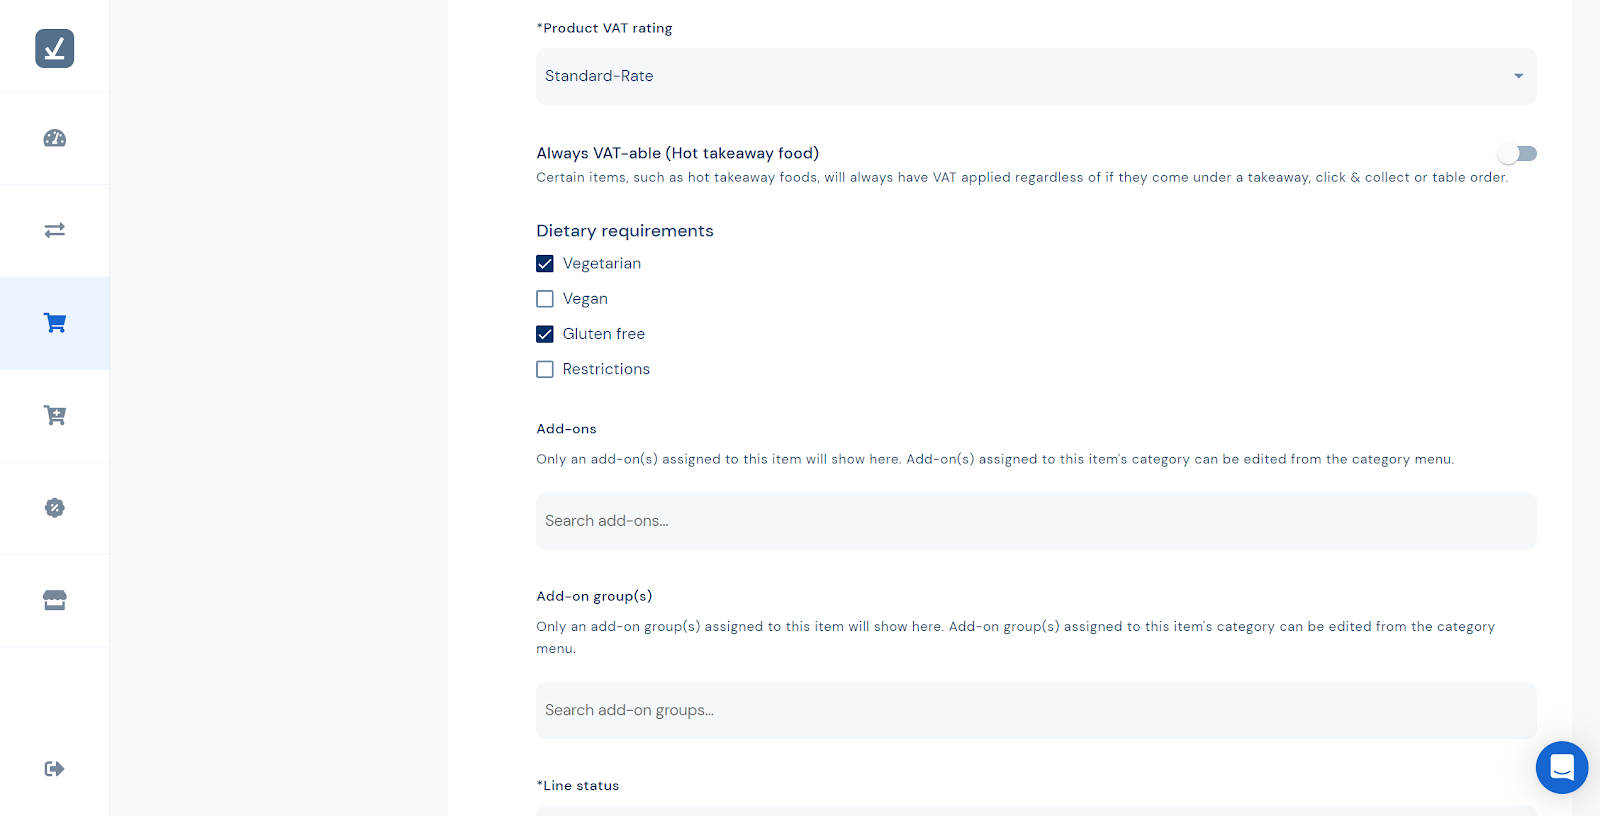
The dietary requirements for the item will not change on the menu until you click the Save changes button.
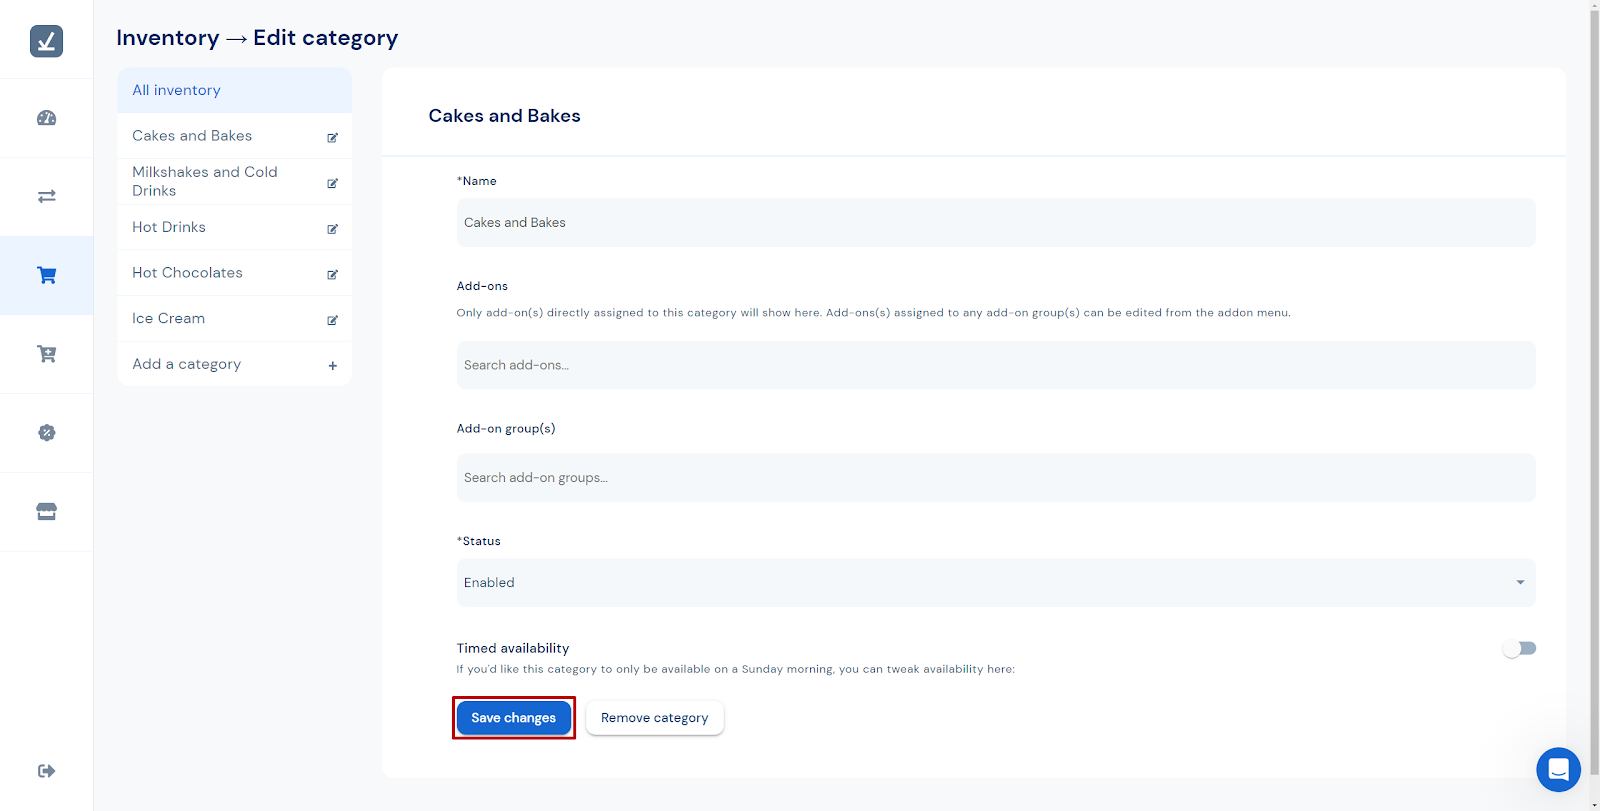
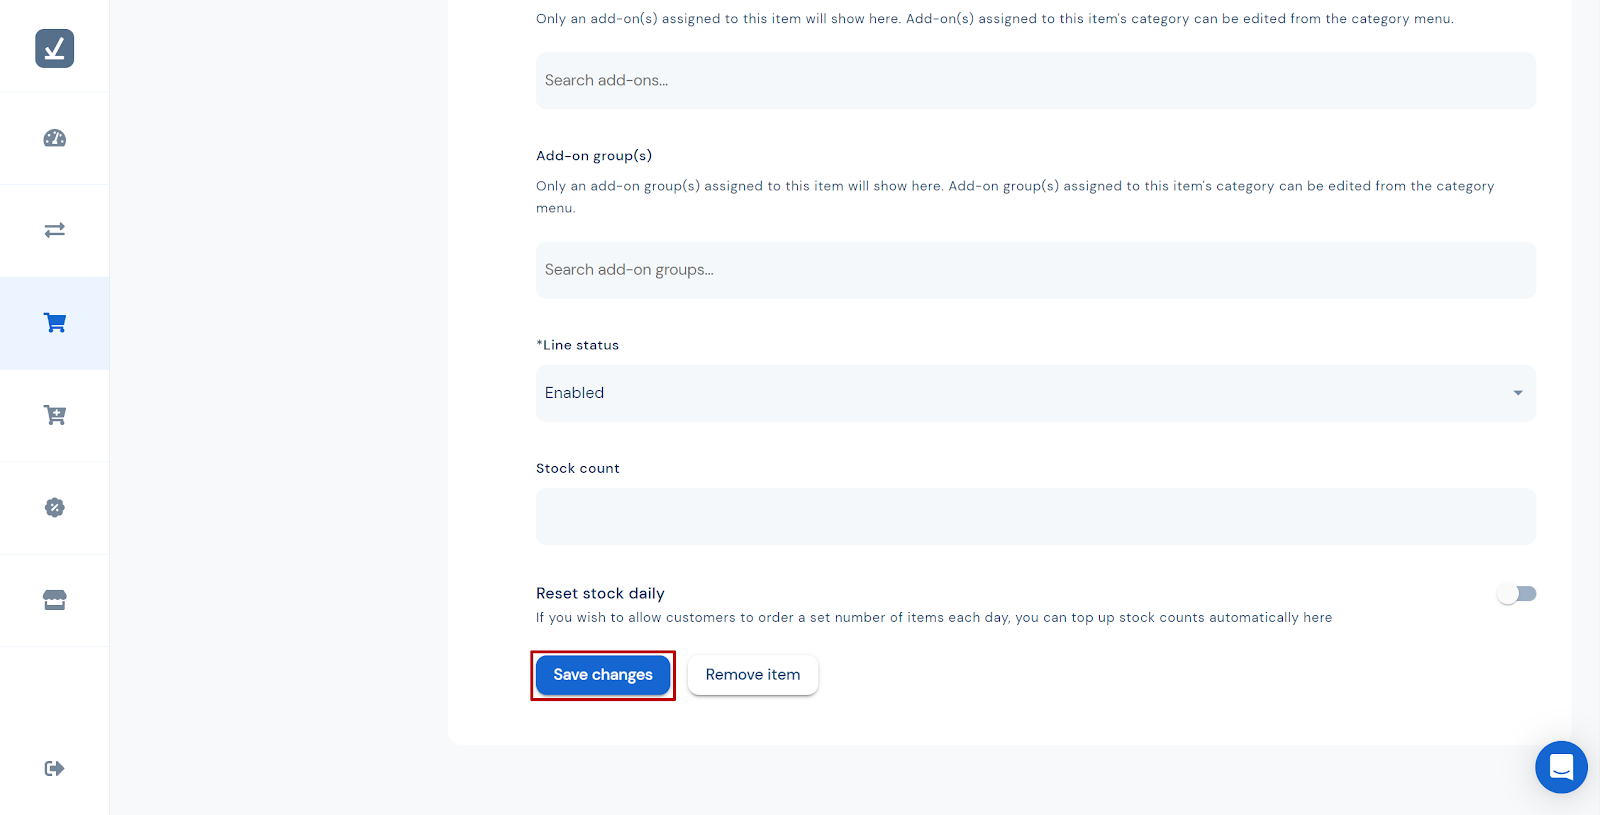
To save any changes scroll down to the bottom of the page and click the blue Save changes button at the bottom.
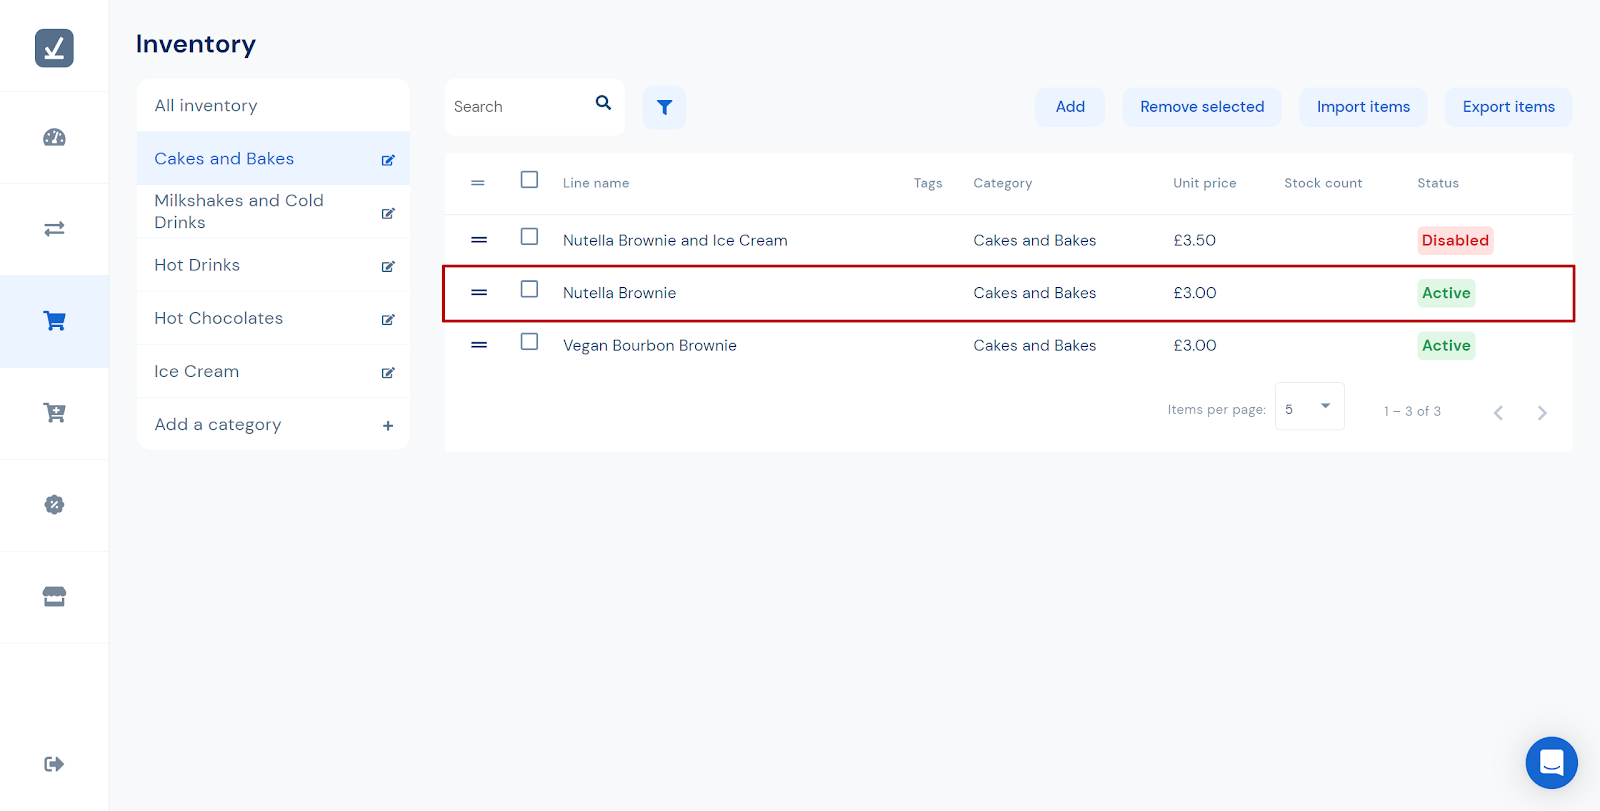
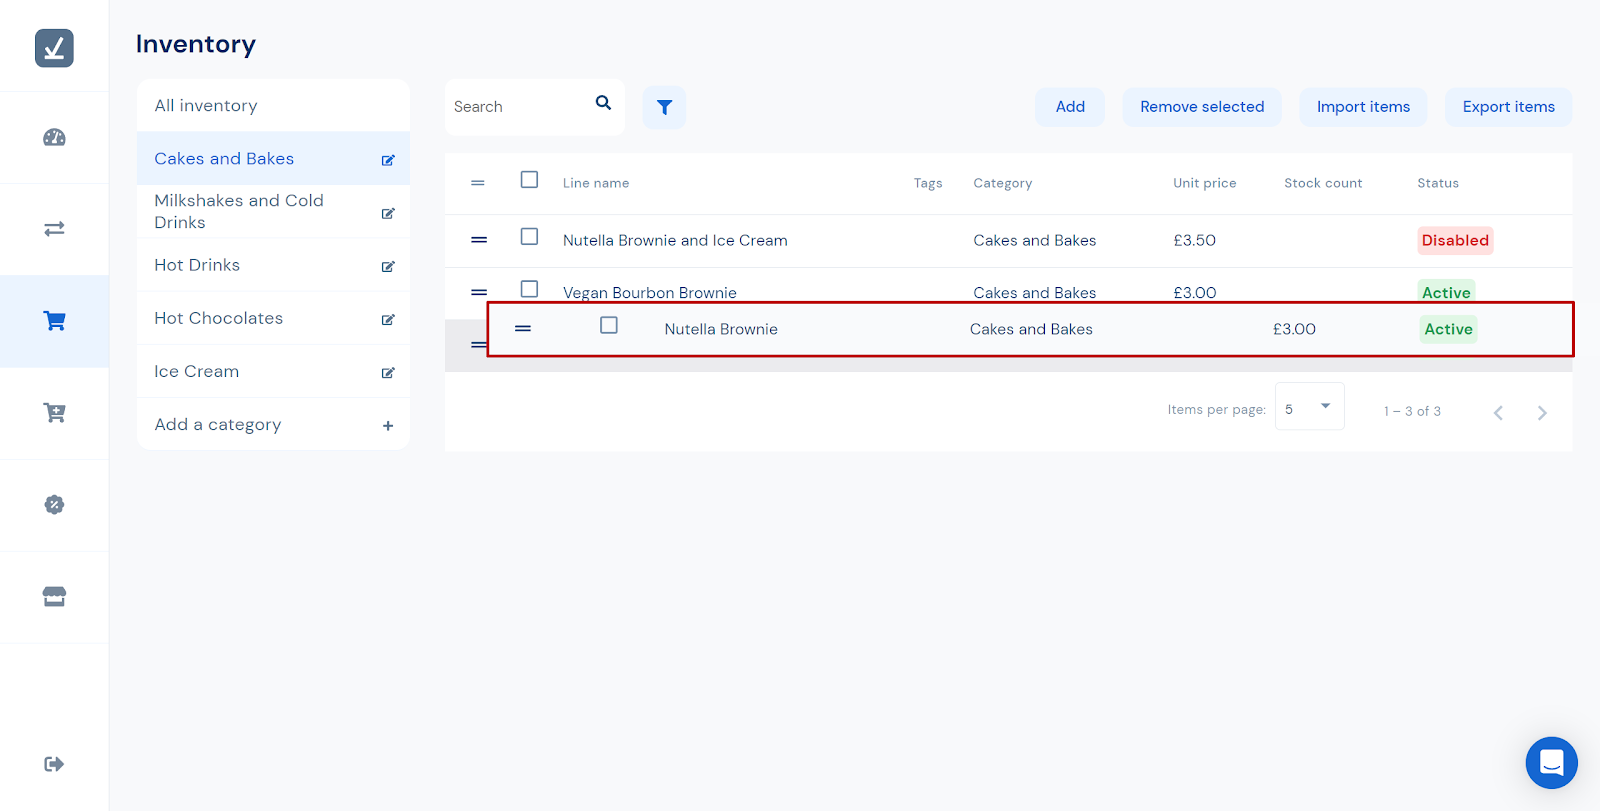
You will see the items automatically reorder as you drag the box up and down the list. In this example the Nutella Brownie item has been dragged beneath the Vegan Bourbon Brownie.
You can get to the ‘Add-ons and Extras’ page by clicking the fifth icon down on the sidebar on the left. The icon is a shopping trolley with a + in it.
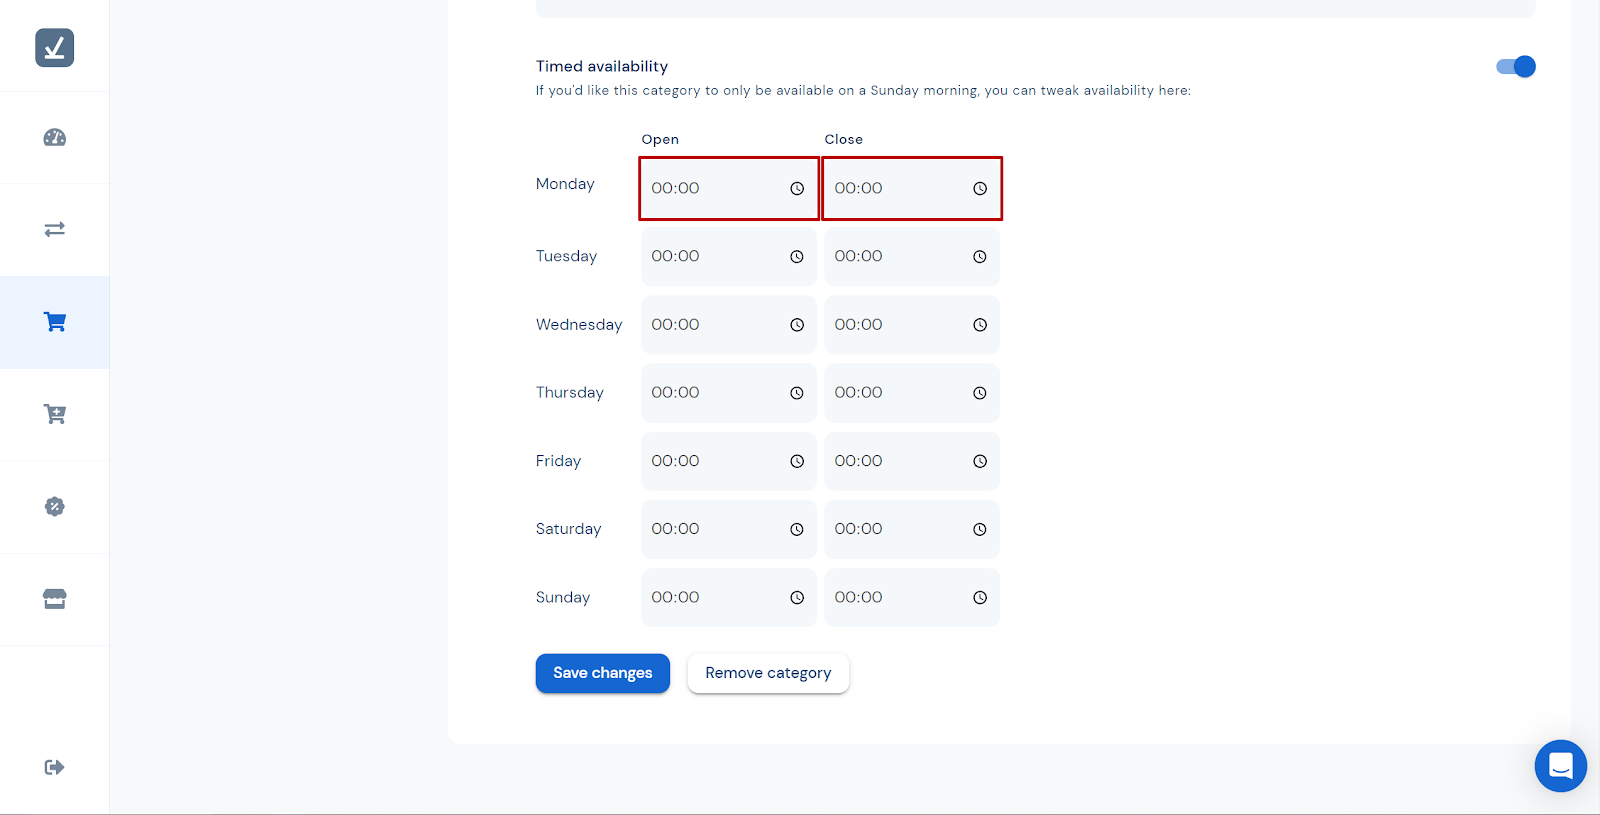
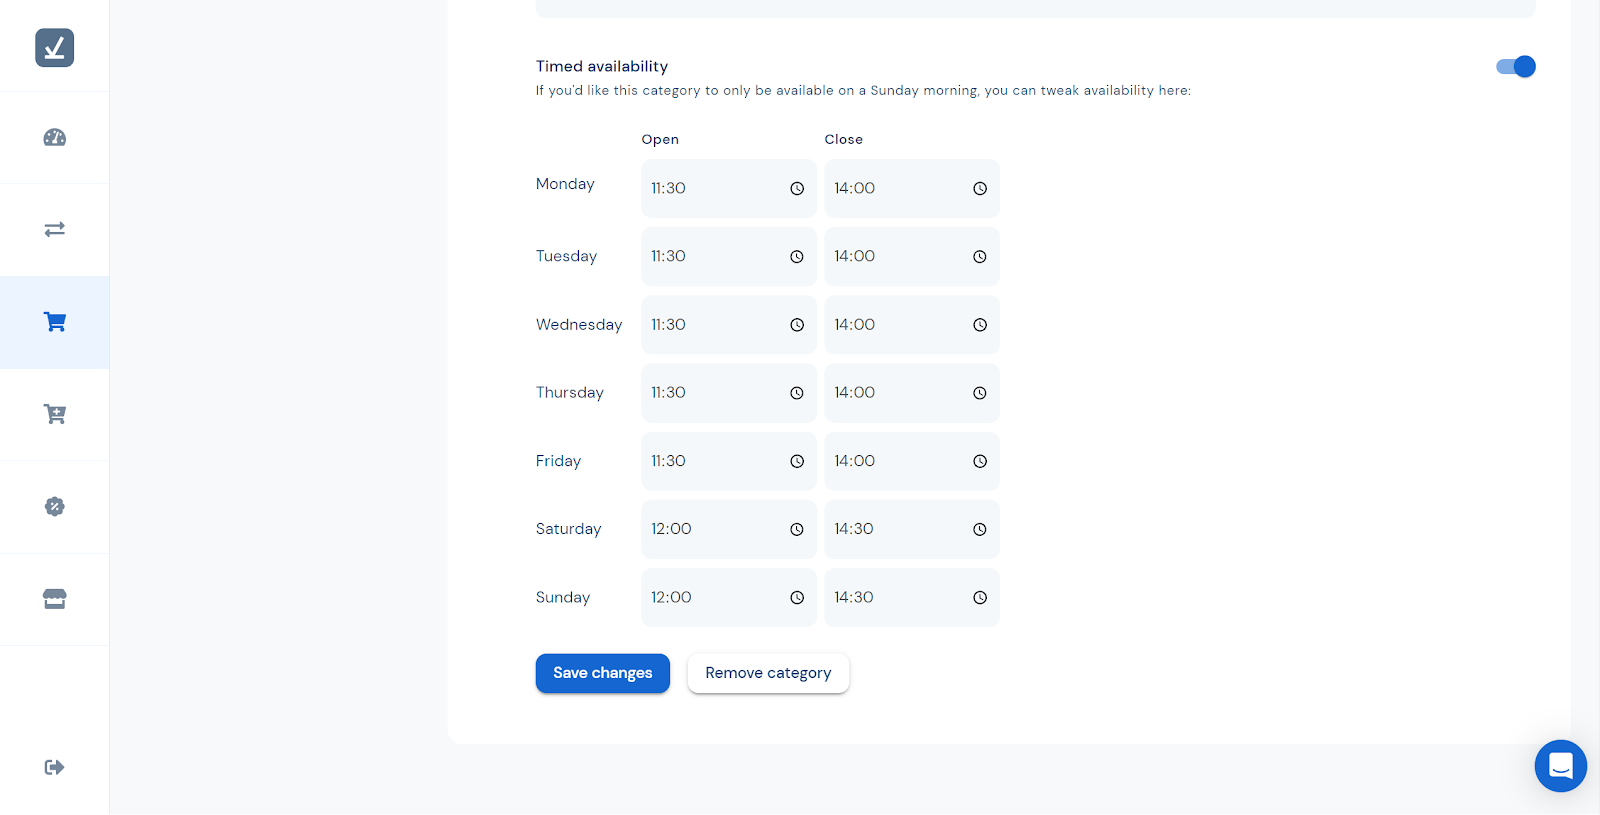
Each individual category can be set to only be visible at certain times. On the CMS this is called timed availability. It is important to note that a category will not be visible if it is outside of the times set for the store opening hours. For more information about setting the store opening hours see: ‘How can I change when my store opens?’. If no times are set then the category will always be visible inside of store opening hours. This is useful if you only serve food during the day and drinks at night or if you have a specific lunch time menu. To change the hours a category is visible:
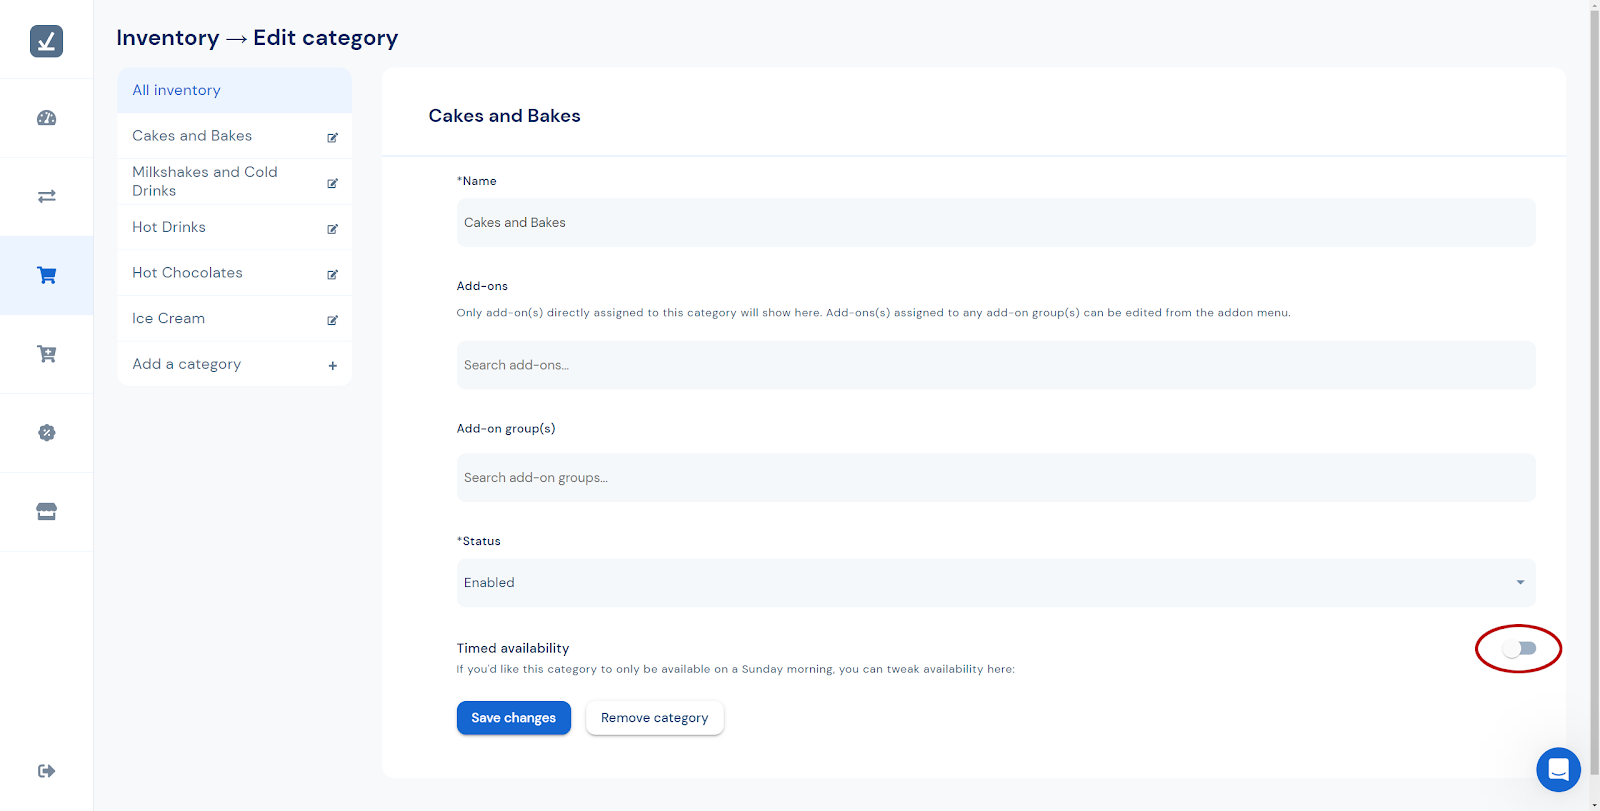
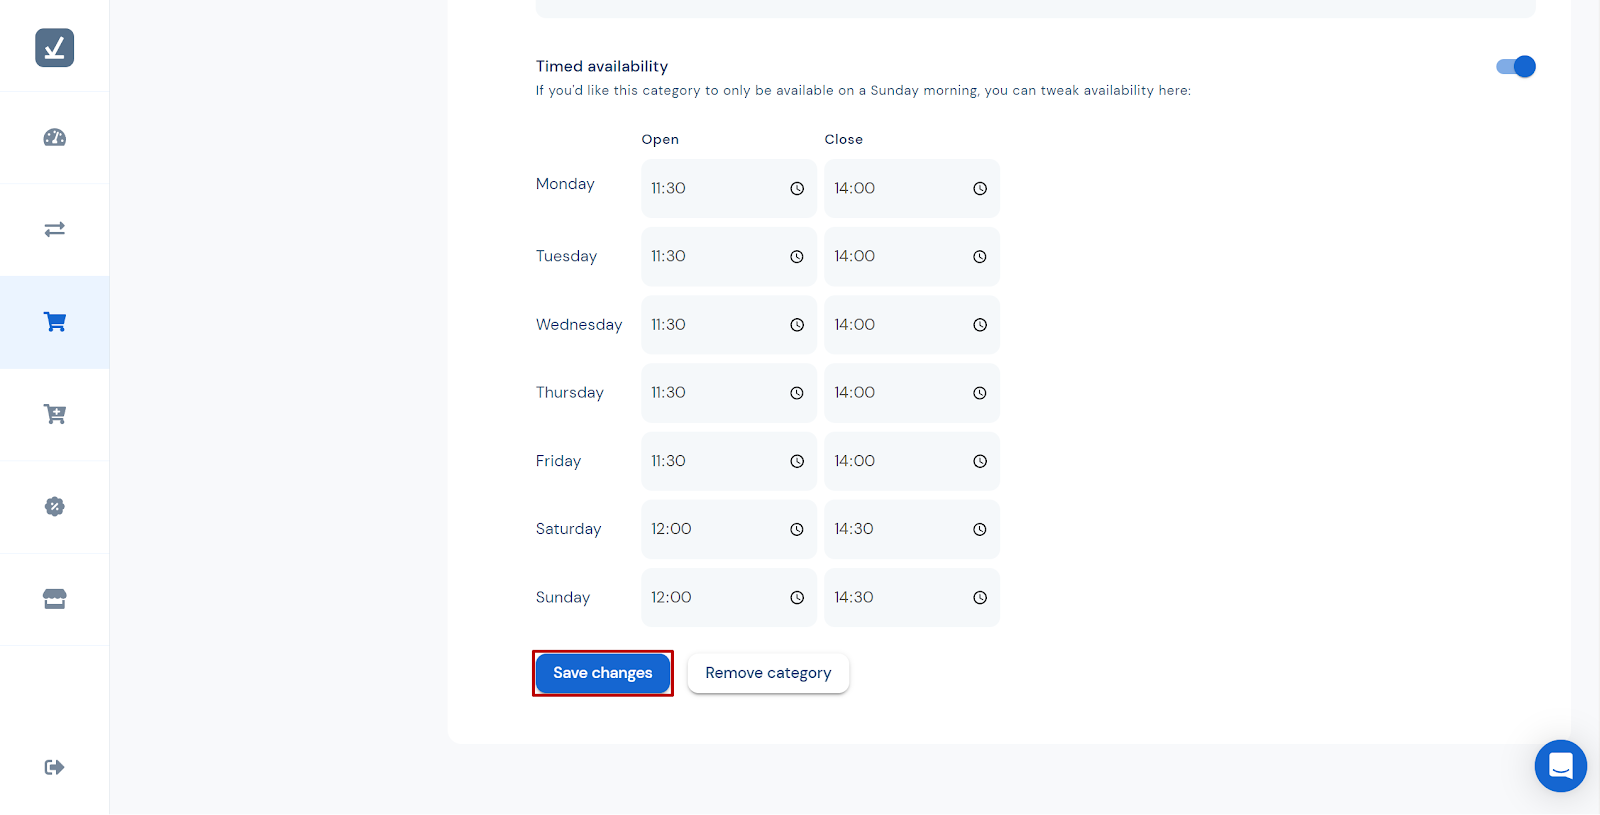
To turn off the timed availability just click the toggle in step two and then click Save changes. The times that were set will still be there if it is toggled back on again.
1. Go to the Discounts page by clicking the sixth tab on the left hand side, the badge with a % sign in.
You will see the existing 100% discount listed here.
2. Click the blue Add new button in the top right of the screen.
3a. Create a name for the discount, this will only be shown internally.
3b. Create the code that you would like the Discount to have e.g. BURGERISM10
3c. Type the value of the discount. e.g. 10
3d. If you need the discount to have a start and or an expiry date then click the toggle next to Discount expires and type in or select the dates using the menu.
3e. If you need the discount code to have a certain number of uses then add this under Total usage limit. A value of 0 will let it have unlimited uses.
3f. By default a discount code is Disabled. You can manually enable it under Discount status.
4. Click the blue Save changes button at the bottom.
Updating a menu.
Raising all prices.
How to create a printing template?

KodyPay Ltd (trading as Kody) is a limited company registered in England and Wales with company registration number 11532575, whose registered address is: Unit 42 24-28 St Leonard Road, Windsor, Berkshire, England, SL4 3BB. KodyPay® is a registered trademark of KodyPay Ltd in the United Kingdom. The KodyPay Card or “KodyCard” is issued by Checkout Ltd or Adyen N.V, each pursuant to license from Mastercard International Inc. Mastercard® and the circles design are registered trademarks of Mastercard International Incorporated.
Kody partners with Checkout Ltd and Adyen N.V. to provide financial services, payment services and banking services (including cross-border services in the EEA). Checkout Ltd is licenced by the UK Financial Conduct Authority as an authorised electronic money institution under number 900816, as listed on the FCA Register. Adyen N.V. (member of the European Central Bank, licensed as Credit Institution by De Nederlandsche Bank) is registered in the Netherlands as company number 34259528. Dutch law defines a bank as a credit institution as referred to in Article 4 of the CRR. The CRR defines a credit institution as an undertaking the business of which is (i) to take deposits or other repayable funds from the public and (ii) to grant credits for its own account.


